GSoC 2018 – DAWN a decentralized WiFi controller (1st update)

DAWN is using the ubus bindings of the hostapd. Ubus is a messaging system in OpenWrt to which processes can subscribe and publish information or services. The hostapd ubus bindings allow to collect probe-, auth- and assoc-requests. Furthermore, it is possible to deny these requests. Additionally, we can gather client information or deauthenticate clients.
I made my life easy by just extending the hostapd ubus calls with all information I need. I wanted to get these changes upstream but some of my pull request were rejected. I added the bssid, the essid and stuff like this to the hostapd notifications. The pull requests were rejected because I can gather these information through the netlink socket. The ubus bindings of the hostapd should only spread information that can not be gathered in other ways. Now I only have two pull requests left:

Already accepted pull requests:

Added channel survey data in libiwinfo

I had to made the decision, if I want to directly use nl80211 or some library. I already used libiwinfo to contentiously update the rssi of the connected clients. Furthermore, the libiwinfo library is often installed on OpenWrt devices. With the libiwinfo it was possible to gather the essid and the bssid of the WiFi interface. The only information I missed is the channel utilization. The channel utilization is a value between 0 and 255. It is a measure how much a channel is used and what capacity is left.
The channel utilization can be calculated:

Unfortunately, the needed information is not contained in the libiwinfo. So I extended the lib by the necessary information: https://github.com/PolynomialDivision/iwinfo/tree/feature/channel_util
There is some weird behavior of the ath10k driver that I tried to debug. The ath9k driver is working very smooth. If I try to obtain channel survey data without waiting a short time, the survey results become 0. Just waiting between 2 calls fixes the problem.
When I had to figure out how to contribute to the OpenWrt projects. (https://git.openwrt.org/project/iwinfo.git) This can be done via the mailing list. There is a nice tutorial how to send patches using git (https://burzalodowa.wordpress.com/2013/10/05/how-to-send-patches-with-git-send-email/) I’m still waiting that the patch will be merged.

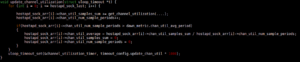
Now I can calculate the channel utilization. Instead of always updating this value, the channel utilization should be averaged. (channel utilization value can be very dynamic)

That’s it. Now I had to rewrite the daemon to gather the informations from the libiwinfo.

Bootstrapping

I want to implement bootstrapping. If a router joins the decentralized controller, it should automatically get the configuration from one router of the decentralized group. Different solutions are possible. I could use scp, rsync to get a configuration from another node. I wanted a different solution. With uci (Unified Configuration Interface) you can configure daemons. I use uci to read my configuration into the daemon. My idea was to send the daemon configuration via the network as a string and use uci to configure the daemon configurations file. Unfortunately, I had some troubles with the uci lib. This approach is not finished.

Lesson Learned – Use calloc instead of malloc!

I spent a lot of time trying to fix some stupid mistake.
The ubus c-library has a function called ubus_add_subscriber which expects a ubus_subscriber. Everything was fine in my old implementation because I used a global variable. Now I wanted to add more subscriber using an array of pointers. What I did was:
struct ubus_subscriber *sub = malloc(sizeof(struct ubus_subscriber));
ubus_add_subscriber(ctx, sub);

This crashed all the time and I was very confused. Finally, a friend of mine said that I should try calloc. It worked! The function ubus_add_subscriber goes through the existing pointers in this struct if they are not null!
Lesson learned: Use calloc. 😉

Lesson Learned 2 – Read header file comments carefully if they exist!

If you use uci_lookup_ptr(ptr,”bla.@bla.bla=blavalue”,true) it will not work!
uci_lookup_ptr needs a string that can be edited and that is not constant! 😉

GSoC 2018 – Better map for nodewatcher (1st update)

Since my last update I made a lot of progress in understanding how nodewatcher works, mostly around Django, and implementing some of the elements I stated in my last post.

My progress in the beginning was very slow because I hadn’t used Django in such capacity used in nodewatcher. But after a couple of trial and error moments and a lot of help from Django forums and wlan-si members I was able to get a grip of the things I needed. There should be a more detailed description as to how to some parts of the nodewatcher system work. Currently only a handful of people know how the whole system work and that shouldn’t be the case, I will try to document most of my findings and contribute them to the project to help others later on.

I started my own leaflet map in order to begin progress on the map while I learned everything around the current nodewatcher schema. I tried to implement the basic functionalities first to see how the whole code is layed out. As you can see from the picture below I tested out the fullscreen option of the map and also the color representation of the different nodes. In the top-right corner I also added the support for selecting which nodes to show.

This is just a test example and there is a lot of work implementing this into nodewatcher because here I wrote my own script and added the markers by hand. The biggest part is that I need to figure out where to add this code to nodewatcher and make it work with real nodes. I hope to have this figured out until the next update so that some of the features get added. These features are subject to changes and will most likely change in appearance.

I also had some problems with implementing new scripts but that shouldn’t pose a problem in the future. As I said earlier the main problem is adapting to the current code and maintaining its structure so that there isn’t any confusion when someone else takes over. But as I said this involves a lot of asking around for help and will be helpful later on because I hope to continue with this project after GSoC.

After that I will start working on the side menu and anything else that shows as a good addition to the map but for now it is important to learn how the system works and add basic upgrades so that later on it is easier to focus just on adding new elements not wasting time with learning how everything works again.

Tout médicament non utilisé ou déchet doit être éliminé conformément à la réglementation en vigueur. Les comprimés pelliculé sont jaune clair en forme d’amande, avec l’inscription. Imprimer Theme par defaut Theme doc avenue Theme dexther web. online casino Forme et présentation Composition Indications thérapeutiques Contre-indications Mises en garde spéciales et précautions d’emploi Effets indésirables Recommandations médecins Recommandations patients Fertilité, grossesse et allaitement Interactions avec d’autres médicaments et autres formes d’interactions Posologie et mode d’administration Durée et précautions particulières de conservation Incompatibilités Surdosage Propriétés pharmacodynamiques Propriétés pharmacocinétiques Effets sur l’aptitude à conduire des véhicules et à utiliser des machines Classes thérapeutiques Classes ATC Données de sécurité préclinique Précautions particulières d’élimination et de manipulation Conditions de prescription et de délivrance Forme pharmaceutique Nature et contenu de l’emballage extérieur Données technico-réglementaires.

GSoC 2018 – Kernel-space SOCKS proxy for Linux – June progress

Assembling the testbed

I decided to give you a brief intorduction to the development of my testbed. In the past month most of the time I experimented with different virtual environments for kernel development. The pros of virtualization:

  • Fast test cycles: multiple virtual machine (VM) can use the same, freshly compiled kernel
  • No physical devices, you dont have to reboot your machine every time when you want to test your recent kernel changes. VMs reboots very fast (about 6-7 sec in my current setup)
  • Flexible network virtualization: you can connect your VMs with virtual ethernet links to virtual switches

My current worflow looks like this:
1. Make changes in the kernel code or configuration (make menuconfig or .config file)
2. Compile the modified kernel
3. Boot the virtual machines with the new kernel
4. Test if works, debug, etc.
5. Goto 1.

In the following you can find a detailed intro how to setup the kernel development and test environment with QEMU and virtual networking

Continue reading “GSoC 2018 – Kernel-space SOCKS proxy for Linux – June progress”

GSoC 2018 – Ground Routing in LimeApp – 1st update

Overview

In this past month I was working on the update of the lime-app dependencies (it was quite outdated). I also worked on the view and the ubus module that reads and saves ground routing settings in the LiMe config file.

The view: (Github LimeApp branch)

It is the minimum configuration of a plugin for lime-app. It has defined the constants, the store, actions (set and get) and basic epics to obtain the data using uhttp-mod-ubus.

Lime-app uses Preact for rendering the views, redux for state management and rxjs-observable as middleware for asynchronous events. For now you only get the setting as a json and expose it to the user.

Ubus (Github lime-package-ui branch)

Create the lime-groundrouting package that exposes and sets the graound rotuing configuration to lime. For the time being, just expose the settings.

ubus call lime-groundrouting get

To do this I use the LUA library lime.config.

Next step: Save changes.

In the coming weeks I will mount the form and the validation scheme in both the app and the ubus module.

OpenWLANMap App: Update 1

Hi,

As I mentioned in the last blog post [0], the first step I did is defining the app’s functionalities[1] and designing the app architecture.

Basically the app contains 1 service, which runs in the background and communicates with UI thread per broadcast (public-subscriber pattern). Since as default, the service will run in the main thread, which is not wanted, I created a ScanThread to handle the scanning. It sends every 2s as default (and should be adapted with user’s speed etc. later) a scan request to the WifiLocator and gets a scan result back from it asynchronous. The WifiValidator then validates the scan result as well as the returned location, and puts the valid wifi access point in a WifiQueue. The WifiStorer will take anything from the WifiQueue and writes it to local disk (simple Consumer-Producer pattern). Based on the user’s upload mode setting, the WifiReader will be triggered if uploading is wanted, reads the local disk files in wanted format for uploading and passes it to the WifiUploader. It then uploads the data to any supported project api and as soon as the uploading is successful, the data will be deleted and ranking will be updated.

The next step I did is designing the new UI, got some feedback from mentor and changed it appropriately. Also in the process I defined all the user’s setting options. I spent a lot of time reading the android documentation for parallel processing and made decision for each functionalities, which is relevant for the next part. (WifiStorer, WifiReader: normal Thread, WifiUploader: AsynTaskLoader etc.) I write more about it in the next post.

Finally I jumped into implementing. I started with the demo mockup and then slowly implemented the logic part. I have finished the scan service and a part of the WifiValidator.The WifiLocator uses gps for defining location if available, otherwise it makes a request to openwifi.su with the surrounding wifis. I provided methods to do it with both new and old openwifi.su api in case we want to use any of them in the future. I ran into an android bug, where the wifi scan result is always 0 if the user disables GPS, even the location permission is granted.(Tested on Android 6). It is kind of weird because scanning wifi does not have anything to do with the gps and turning on gps the whole time will cost phone a lot of energy. Still it’s kind of wanted feature from Android to make users aware that their location information is being accessed when they use kind of app. Because the location of user’s phone could be defined based on the collected wifis. Since it is OS design, I pop up users a message with those information to ask them to turn on their GPS if they turn it off. I also implemented a part of WifiValidator, the WifiFilterer to check if an access point is openwifi, from freifunk or mobil hotspot or marked with _nomap (which should not be collected).

What’s now?

If you want to check the app, feel free to download install file .apk from [2].

If you as usual do not want to install an unknown source, I also provide a short demo video


What’s next?

In the next time, I will finish the WifiValidator, which should not only filter the access point but also validate the location to provide scan service a better scan period to save energy (in case the location is not changed for a long time, the scan service should be stopped etc.) and then other parts as shown in architecture image above.

Links

[0] https://blog.freifunk.net/2018/05/14/introduction-openwlanmap-app/

[1] https://github.com/openwifi-su/OpenWLANMap-App

[2] https://androidsmyadventure.wordpress.com/2018/06/03/openwlanmap/


The Turnantenna – First evaluation update

After a month of work on the project, the Turnantenna’s driver is evolving to the definitive version.

During this month I worked hard in order to write a good driver for the stepper motors. If you’re looking for more details and want to understand the basic functioning of the Turnantenna system look at my first blog. My work could be find on GitHub.

Overview

Image found at http://abhieeeprojects.blogspot.com

From wikipedia:

a unipolar stepper motor has one winding with center tap per phase. Each section of windings is switched on for each direction of magnetic field.

To control the position of the rotor, we have to play with the stator’s windings, following a proper pattern in order to make the first move smoothly.

The driver does exactly this, it turns ON and OFF the pins of the logical board (the orange pi) following the correct pattern; doing so the coils of the engine are powered properly, and the rotor turns.

The older version of the driver was a good prototype, and I based my work on it. As a good starting point, I didn’t change the overall scheme, but I found some problems with my mentor and I worked to solve them. The most important issues were the following.

Problem #1 : A poor control of inputs

We used python 3 to write the code. The driver is a class, called Stepper, that has some methods. Calling those methods, the object controls the real engine. To do so we needed to use the python wiringpi library.

The old code was something like this:

import wiringpi as w

class stepper():
    def __init__(self, pin1, pin2, pin3, pin4):
        """Set up the GPIO pins and all the attributes"""
        w.some_method_to_initialize_the_board()
        w.some_method_to_configure_the_pins(pin#)
        self.initial_attributes = XYZ
        ...

    def stop(self):
        """make the engine stops"""
        w.some_method_to_turn_off_the_pin(pin1)
        w.some_method_to_turn_off_the_pin(pin2)
        ...

    def move(self,speed,rel=1,dir=1):
        """make the engine run somehow"""
        ...

engine = Stepper(0,1,5,12)  # Random pin numbers

engine.move(250, 100)

To make sure that everything works, inputs should be controlled properly:

  • Pins choice should be controlled, different coils can’t use the same pin.
  • Values should be integers, not chars, lists, tuples or others
  • At this time, I don’t know what happen if I run the engine with negative speed. Will it go back?

This kind of control was lacking in the older version. This is our first problem.

Problem #2 : Too many input variable

Look at the “move” method, could it be simplified? The answer is yes.

dir (direction) parameter is not so useful. It was intended to switch between “go ahead” and “go backward”. But if I want to go in the opposite direction, I could say I want to do a movement with a negative speed. In the newer version I adopted this scheme allowing negative values for the speed, and removing the dir parameter.

rel (relative) could be removed too. Its function is to keep in memory the last position of the engine, but it could be better done using an object’s attribute.

Problem #3 : Wrong speed management

Thanks to Leonardo (my mentor) who discovered this problem, I had to plot the following graph that demonstrates the presence of an error in the algorithm used to accelerate the engine. To understand the problem, you need to see that the driver was intended to make the engine accelerate with a constant rate. In other words, acceleration has to be constant [1], and speed has to increase linearly [2].

Note: in the real code I added an acceleration factor which allows to manage the magnitude of this acceleration. That doesn’t impact on the constant acceleration hypothesis.

The simplified version of the algorithm is something like this:

# inputs: num_step, final_speed, speed = 0

step_count = 0
while step_count <= num_step
    speed += 1
    t = 1 / speed
    self.do_one_step()
    time.sleep(t)
    step_count += 1

Where:

  • num_step stands for the total number of steps that should be done in the acceleration phase;
  • final_speed is the goal, the speed wanted by the user;
  • speed is the actual speed value. Here we are in acceleration phase, and that’s why we’re starting from speed=0

It’s clear that the algorithm increase the speed constantly (and linearly). So the condition [2] seems to be satisfied.

However, speed is not directly used. To manage the step frequency, the time delay is used instead: this simplify the algorithm. But there is a problem, and this graph demonstrate that hypothesis [1] is not verified:

The graph shows a first interval where speed increases (acceleration), another one where speed is constant, and the last one where the engines slows down (deceleration). We can say that deceleration is a negative acceleration, in fact the two external intervals are specular.

In the graph we can note an hyperbolic shape of the acceleration phases. That’s a proof of the non-constant acceleration. The problem is that we expected a different graph, and wanted to see a linear shape of the speed function. The driver works, but not as we like.

The bug here is in time managing, since it don’t decrease linearly. Time is defined as t=1/speed, and that’s an equilateral hyperbola’s equation. Right now I’m working on a solution to obtain a linear, simple equation.

Solving problems : Make it clear

As this code will be published, I added a lot of documentation like comments, docstrings, and more verbose and specific error handlers. I rebuilt the entire move method to make it more clear and readable, and to solve the problems listed before. I wrote it down simultaneously with the tests, and it’s still work in progress just because it has to be bullet proof.

Tests

I can say that tests was the core activity of this month. I wrote tests, done tests, tests the tests, delete some tests, write new tests, correct other tests, added new tests, and still testing.

All the improvements done to the original code, was born from tests. I’m a newbie with python, and testing opened my mind to a tons of things about coding. Now I’m still testing and deepen the code, and how to improve it.

Conclusion

Now this first period is almost finished, and it’s time to conclude the last things. After that I’ll starting develop the web interface to control the driver from remote.

I make no secret of the fact that this project is a very challenge for me. This is my first serious coding experience. Almost everything is new, but the Ninux community is really supporting me. A special thanks goes to Leonardo and Edoardo, and their patient.

See you at the next post!

Meshenger – P2P local network messenger – Update 1


In the recent weeks i have made quite some improvements on my initial demo application:

  • share information using channels like Telegram instead of a QR-Code
  • turn off the screen when the earpiece is held to the ear during a call,
  • use IPv6 link-local adress when possible, IPv4 as fallback.


I have jumped into WebRTC development, searched and evaluated different projects with similar goals:

  • serverless-webrtc-android
    • barebone example of WebRTC without signalling servers
    • I ported the code from Kotlin to Java for a better understanding and integration into the project
  • webrtc-android-codelab
    • loopback example: WebRTC PeerConnection through localhost, providing insight into how to connect two nodes running on the same device
  • android-webrtc-tutorial
    • insight into how signalling works through an external server

The given examples helped me to collect a knowledge- as well as a codebase which I will further use to implement video and audio transmission over WebRTC.

Evaluation, hacking and testing of those examples helped me to get a understanding of the inner-workings of WebRTC and will surely support me in the Integration of WebRTC into Meshenger.


Here are some screenshots of the current state of the application:

Contact list
Scannable QR-Code
QR-Scanner
Manual information exchange


My next step will be the adaptation of said projects to the newest WebRTC-version

as well as further dealing with the fundamentals of WebRTC and finding a way to circumvent a central server.


GSoC 2018 – LibreNet6 – Update 1

During the last few weeks I jumped into LibreNet6 and started on setting up a local testbed. With a couple of routers and an virtual machine with real a IPv6 subnet I followed the current Setup (Spanish) guide and eventually got it running. The process had various stumbling stones and is rather unpleasant to setup. In a future setup I’ll try to make the setup as simple as possible, only involving the installation of a single package.

The need of LibreNet6

Simply said, LibreNet6 allows using the IPv6 functionality of LibreMesh (LiMe). With a single configuration file at /etc/config/lime it’s possible to set nearly all functionality of the LiMe framework, from access points, mesh connects, used addresses to activated routing protocols. In the default configuration all nodes have a /64 IPv6 subnet defined which is pseudo randomly generated based on the hash of the defined network name, which thereby all nodes of a (Layer2) mesh cloud share. The subnet is part of Altermundi’s address space, enabling in theory public IPv6 addresses to all nodes and clients of the LiMe cloud. However, most mesh gateways don’t have a direct connection to Altermundi.

There comes LibreNet6, it connects via a Tinc mesh multiple community networks which only have Internet access via a NATed IPv4 address. Only the cloud gateways (CG) have to use babeld, within the mesh network other routing protocols can be used. All the CG has to do is announce public IPv6 uplink to the rest of it’s cloud. Once multiple mesh networks are linked together their clients can start connecting directly via IPv6. A feature of Tinc is to perform NAT traversal so both CG’s may connect directly with one another to avoid routing all traffic over the IPv6 server.

One of the advantages of LibreNet6 is to handle multiple IPv6 server and CG at the same time. Babeld allows to choose the fastest connection within the Tinc mesh and in mesh clouds the used mesh routing protocol decides which CG to take.

Speeding up development

I’m not completely new to the LiMe code and contributed on various end within the last years (motivated by my last years GSoC). Developing and testing new software were always tedious as all packages had to be created individually per targets architecture. To speed up this process I spent some time on settings up automatic snapshot builds for LiMe take care of automatic updating of LiMe snapshot repository. As nearly all LiMe code is Lua, it’s unnecessary to compile packages for all targets. To have a single package running on all architectures, the PKGARCH:=all settings can be used in packages Makefiles, and so I did. As a result, LiMe has now CI and a constantly updated snapshot repository, this will allow me (and other LiMe devs) to accelerate the development and testing of new functionality and packages!

Evaluation of the current LibreNet6 state

So far the setup was roughly like that:

  • Using Tinc 1.0 with a GitHub repository to share public keys, which were then deployed on servers.
  • Babel were installed manually on nodes requiring execution of various bash scripts.
  • Administrators had to [keep track of used subnets
  • manually](http://docs.altermundi.net/LibreNet6/Setup#subredes)

With the previously mentioned testbed I tried some new software and came up with an easier setup which stays compatible with already deployed connections:

  • Use Tinc 1.1 with all it’s new feature called invite and join allows clients to connect simply by running Tinc with a given invite url. This also handels key creation & exchange and setup of all Tinc related configuration files via a invitation-created script.
  • Use of the recently added lime-proto-babled to automatically configure all babeld, inclusive in combination with LibreNet6
  • Offer a lime-app to execute Tinc’s join command via web interface and show state of connection, like a simple IPv6 ping check.
  • Create a simple admin interface to show connected cloud gateways and used IPv6 subnets.

Next steps

So far I spent most of the time on understanding LibreNet6, babeld, Tinc and CI and setting up a running testbed. Next week I’ll create a LiMe package to be installed on CG’s, setting up babeld and Tinc. Also I’ll dig into the lime-app to understand the web framework and offer a simple interface for users. Lastly I’ll write a guide for server owners how they can setup the IPv6 server on a Debian system, using real IPv6 or 6to4 tunnels in case only a public IPv4 is available.

GSoC 2018 – Easily Expandable WIDS – First Update

In this blog post I’d like to present the recent changes made in Eewids, why they were done and what’s to come next. For an introduction of Eewids see here.

In general the steps done the last weeks aimed mainly at the easiness of use and testing the main concept – having an easily expandable framework at hand. Thus, a RogueAP detection was added and visualization based on InfluxData tools and Grafana were included. Both steps were much more easy to achieve because of the architecture of Eewids.

Starting Eewids most easily

For everyone potentially interested in using Eewids it would have been a big hassle to compile Kismet (git development version) by herself. As Eewids is completely based on Docker container most of the components didn’t need to get installed. And that’s quite important. No one wants to compile, start and administrate all the stuff: Kismet, Eewids’ Parser, RabbitMQ, InfluxDB, Telegraf, Grafana and finally the plugins added to Eewids (like the RogueAP detection, see below). While all these components are provided by Docker container and can get started by simply hitting ‘docker-compose up’, the Wi-Fi card had to get accessed directly so far. Therefore, it was necessary to have a recent version of Kismet’s remote capture, which is not included in any major Linux distribution yet.

Luckily Kismet’s developer found a solution to this problem and documented it. We adapted this to the needs of Eewids and now have a solution in which one can start Eewids easily on a local machine, needing nothing more than a compatible Wi-Fi card, docker and docker-compose. Please see the getting-started.md of Eewids for more information and try it yourself! 😉

Renaming fields of captured data

To make the captured data of Eewids as accessible as possible for developers many field names saved in the message broker RabbitMQ were changed to be quite similar to Wireshark’s “Display Filter Reference”. See here.

Hearing Map for RogueAP detection

A simple RogueAP detection which existed before have been expanded by a hearing map. Now a whitelist contains not only valid ESSID:BSSID pairs, but also the information which remote capture is able to see which AP. Thus, an attacker can not use a valid ESSID:BSSID pair of a AP which is located in a different building to cover an EvilTwin attack. See here for more information.

Add a visualization tool: Grafana

We develop Eewids to make it easy to add new functions to it. To test this claim and to actually extend functionality by a way to analyze and visualize what’s happening arround, we added Grafana. It connects easily to different datasets (like InfluxDB, Elastic etc.) and let you create graphs and lists etc. As a starting point we added InfluxDB to save our captured data, Telegraf to get the data out of RabbitMQ and to send them to InfluxDB and Grafana to use the data from the InfluxDB.

Which would have been a hassle to implement on a local machine was quite easy with docker and a already existing dataset provided by Eewids in RabbitMQ. Thus, it only took us some hours to find out how to use this software. Even this time was not related to Eewids itself, but just to the missing basic understanding of Telegraf, InfluxDB and Grafana. That is to say if anyone who already know these tools would have liked to add these to Eewids could have done this easily. And this is the objective of Eewids.

We consider this a successful proof of concept. We used InfluxDB for Grafana, because we expect new things to come which depends on/use InfluxDB. Likewise we can imagine the fast and forward implementation of Elastic and the related tools and software. We’d glad to see this adapted in the future as well. 🙂

What comes next?

Now that we have a visualization tool (Grafana) added, it would make sense to extend it with more information, letting alerts visualized etc. Furthermore, we’d like to improve the “backend” features for developers. That means we would like to create some templates to easily start using Eewids data and adding detection methods. Let’s see how it works out!

DAWN – A decentralized WiFi Controller


Hi,
I’m Nick. I study Computer Engineering at the TU Berlin. It is my first time participating in Google Summer of Code. I am realizing a decentralized WiFi controller.

DAWN is the first decentralized WiFi controller for OpenWrt. The controller provides access to valuable information, e.g., all connected stations, their capabilities, and information about all participating nodes. Moreover, DAWN provides load balancing to increase the network performance by controlling the clients association.

What’s missing?
An important aspect of the controller is the simple installation. Everybody, even people with limited technical knowledge, should use this controller to increase their network performance at home. Until now, DAWN requires a special patched OpenWrt to run. So a user needs to compile his own image. The first thing I have to do is to bring the last patches upstream. Some of the patches were rejected and that is why I have to rewrite different functionality and create new pull requests. Furthermore, I have to extend the libiwinfo library to get all necessary informations from the OpenWrt system.
After this, the configuration of the nodes should be simplified. So far, the user has to configure all participating nodes individually. I want to implement some bootstrapping to automatically configure the participating routers.
After simplifying the installation and configuration, I want to visualize the information of the participating nodes with a graphical user interface.
The last step is to improve the controller functionality by adding mechanisms like a channel interference detection and other useful features. Moreover, this step contains to improve the load balancing.

In my next blog post, I will write about why some of my OpenWrt patches were rejected, how I have to extend the libiwinfo. However, if this steps are successful everybody will be able to simply install DAWN without the need to patch OpenWrt.