one server to sysupgrade them all – second report

During the last weeks I’ve been continuously working on the “image-on-demand” server and the Luci interface. The packages have been split and renamed to be as modular as possible. Developing has been split in the following four packages:

luci-app-attended-sysupgrade

The web interface.  Uses JavasScripts XMLHttpRequest to communicate with ubus and the upgrade server.  Shows basic information to the user.

rpcd-mod-attended-sysupgrade

Has a single sysupgrade function called sysupgrade. It’s a copy of to the Luci sysupgrade function but callable by ubus. This package may be replaced by a native ubus call like ubuscall system sysupgrade

rpcd-mod-packagelist

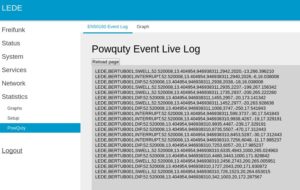
Returns all currently installed packages, ignoring packages that has been installed as a dependency. It works without the need of opkg installed using /usr/lib/opkg/status. The packages hence requires the package lists to be included in the existing image, ie. keepinto unset CLEAN_IPKG on image build. This module is important for routers with less than 4MB of flash storage. The standard package selection does not install opkg for such small flash devices.

sysupgrade-image-server

The package will install the upgrade server with all dependencies. This especially useful for the planed setup of a single web server and a dynamic amount of workers building the requested images.

In the current implementation a single queue builds one requested image after another. A new approach will separate the we main sever from the building workers. The database is reachable by every worker and they setup ImageBuilders automatically depended on requested images. This could make the service easily scale able distributing the load to zero-conf clients.

The server handles the following tasks:

  • Receiving update requests
    • Validate request
    • Check if new release exists
    • If not, check if packages got updates
  • Receive image requests
    • Validate request
    • Check if image already exists
    • If not, add image to build queue
    • Return status information for the router to show in Luci
  • Forward download requests to a file server
  • Manage workers
    • Starts and stop  workers
    • Receive created images
  • Count downloads

The workers handle the following tasks:

  • Request needed Imagebuilders from the main server
  • Download, validate and setup Imagebuilder
  • Build images and upload to main server

Requesting Images

Do demonstrate how the image requests work I setup a few small scripts. Once called they request the image specified in the json file. Don’t hesitate to modify the files to perform whatever request you’re interested in.

Depending on the request you receive different status codes:

201 imagebuilder is setting up, retry in a few seconds
206 image is currently building, retry in a few seconds
200 image created

The requests repetitions are handled by the luci-app-attended-sysupgrade but must be manually retried by the current demo scripts. Eventually a CLI will follow.

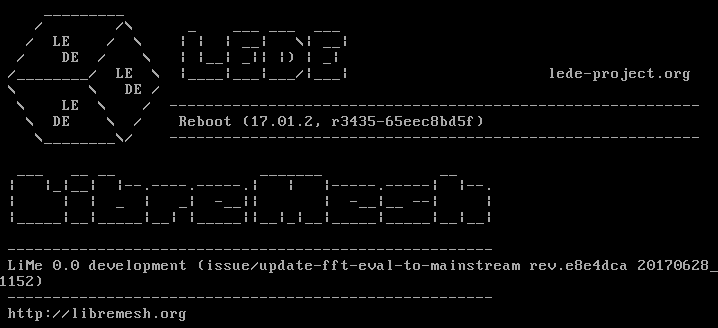
Currently the distributions LEDE and LibreMesh are supported.

Future

Soon I’ll create a Pull Request for all three router packages to merge into the OpenWrt community package repo. At that point current installations could install the packages for further testing. All three packages are tested with a virtual x86 machine and a wr841 router.

Currently Secure HTTP is used for image distribution, to improve the security I’ll look into usign to create signatures for all images.

To enable reproducible builds I’ll create an auto generated info page with all information about the image, especially include the Imagebuilders manifest file listing all installed packages with versions.

The Luci view should be more verbose and also able to notify on updates directly after login (opt-in). Currently a simple “update successful” message will notify the user after an update. This could be expanded to a report function to let the update server know which images fail and which work. All gathered information would be helpful to create different release channels.

PowQuty Live Log Second Update

It’s been nearly a month since my last update on the PowQuty Live Log project and i would like to tell you, what has been done
so far and provide information on what will be done in the next month.

PowQuty got updated, to support Slack and mqtt event notification and can already be used in the current PowQuty version.
In addition to this, there have been some bug fixes during the last month and some new features were added.
On event occurrence the event gets stored in a csv file and each entry is displayed in the luci-app. To increase the usability,
a traffic light system will be added, which will show for each event type its occurrence time and show if the current values
are in violation of EN50160.

  • Green: Everything is ok, no violation
  • Yellow: Close to a violation
  • Red: This event time is in violation of the norm
  • The event messages contain a times stamp, the duration of the event and updated event Type information, as well as event type related
    information and GPS data.
    .

    As receiving notifications or emails on every event occasion can get noisy, we decided to provide a weekly summary of the events in
    addition to the regular notifications.
    The user will be able to decide if he wants to receive this summary, every event, or both. We consider using the traffic light system
    here as well, to increase the readability and enable users to understand the quality of their power supply network, without a lot of
    knowledge of the EN50160 norm.
    We discussed individual intervals and keep it in mind as a possible later feature.

    Best regards
    Stefan

    OpenWifi status report before 2nd evaluation

    Hello everyone,
    this is the second milestone blog post about OpenWifi. In this blog post I want to talk a little more about the authorization in detail and give an update on what has been done in the last weeks.

    Authentication

    Authentication was enhanced with possibility to use a client side certificate or apikey (which can be send to the server with a HTTP-GET like ?key=MY_API_KEY). It uses groups to distinguish between the authentication methods and if you login with username/password it is also possible to mark a user as an admin.

    Username/password login uses cookies and client side certificates have to validated by a proxy (like nginx for example) and added to the header. It is you can find the code for authentication and groups.

    Authorization

    The basic principle of authorization in pyramid is a ACL based authorization that gets principals (basically strings) from authentication. These ACLs are given by so called factories (if a view doesn’t use a custom factory the so called root factory is used).

    I decided that it would make sense to have two strategies for authorization – coarse grained and fine grained. I’ll talk about the two in the next part.

    Coarse grained authorization

    Coarse grained authorization is based on specific views and access to a node. Access to specific views is managed by the root factory which is just a simple ACL that stores which groups have access to which views (like only admins can manage users and access objects, admins and client side certificate can add nodes).

    Access to nodes is managed via access objects which are attached to a user or apikey and also attached to a list of nodes. (There is also a special setting that gives access to all nodes) To protect views that operate on a single node (like settings, status, etc.) there is the node context factory which generates an ACL that requests access to the specific node. (a user/apikey is given principals that match their accessible nodes)

    To protect views that list nodes there is the get_nodes function that returns all nodes accessible by a user.

    It might be a good idea to extend the node access that it can define what can be done with the node (to allow/disable luci access or ssh key access for example).

    Fine grained authorization

    Fine grained authorization is used in conjunction with the graph-based DB model. It is still WIP and I use a separate branch for it.This uses the data portion of the access object. Since access to the model is given as a rest API provided by cornice I’m using cornice validators give access. Since it shall be possible to share the same master configuration across different nodes it has to determine what are the maximum access for all nodes using the config for this user is.

    Access can be granted in two ways – either by specifying a “path string” and an access (like rw, ro or none) or by just a allowing one specific query to the db. A path string has the following format: ConfigName (ConfigType).LinkName.Config2Name (Config2Type) etc. I want that it is possible to use regular expression for matching these names.

    To make things easier I started by just comparing the levels of the “path string” to see if they refer to the same string when trying to figure out the maximum rights for a given node set.

    Services

    Julius, Arne and me started thinking if it is a good a idea to make it a little bit easier for external software to just update nodes with specific configuration options. So that this software doesn’t need to use queries for all the options it wants to modify. (And therefor use polling to update new nodes etc.) After thinking a bit about it I decided it would be a good idea to add something like services a service can register to. This service contains a shell-script and a compare value to determine if the node is desired to be modified by this service and also a list of queries that should be applied to this config.

    Arne is using this to set a ONOS Server for the nodes via OpenWifi.

    Discovery Script

    The discovery script was updated to use client side certificates and advertise if the node is able to communicate via TLS.

    Graph-Based DB Model

    The GUI for the graph based DB model was updated a bit – now it is sorted with a different algorithm (based on the direction) and also displays information about the vertices (there for the is a small rest API for the vertices).

    Also a lot of the code was refactored which will make it easier to add new features here.

    Miscellaneous

    It was evaluated how a github page could be used to add more documentation for OpenWifi. Some small things in the docker image were fixed as well. (for example discovery not working with nginx image or wrong file system rights)

    What is going to be done in the next weeks

    Fine grained access proved to be more complicated than I thought. But I want to finish it soon and start working on the communication abstraction. I also hope that there is enough time to improve the graph based db model (since the code is now refactored it should be not to hard).

    How to streamline app development on OpenWRT

    I’ve been strugling with the workflow of the development.

    The development workflow has a lot of shortcomings:

    • depends on hardware features (like a radio)
    • the platform where it runs is an embedded operating system, so you need one to test
    • the architecture is not the same as my development computer, so running the same code in my computer is difficult (don’t have ubus, libc is different)

    If I solve this, the solution can be used to better do Continuous Integration by testing code on a comparable platform.

    So I started looking for a way to work easier.

    These are my requiremnets:

    Must:

    • openwrt machine (could be VM)
    • be able to run recently coded code

    Desirable:

    • virtual machine
    • rapid turnaround time

    So, this are the options that I found:

    Portable OpenWRT devices (MR3020)

    Use this with an ethernet cable and ethernet card, connect to it through ssh and sync code with device.
    On the router:

    opkg install openssh-sftp-server


    On the pc:

    sudo apt install sshfs
    sshfs root@192.168.1.1:/root/testcode testcode
    

    In order to umount the directory:

    fusermount -u testcode

    This allows to have a native platform, all the hardware features, but has the downside of having to have a device connected to the computer.

    Virtual Machine

    This way of calling qemu lets me have a local virtual machine, but does not have access to the network:

    qemu-system-x86_64 -nographic -M q35 -drive file=output/x86/generic/Default/lime_default/lede-17.01.2-libremesh-x86-generic-combined-ext4.img,id=d0,if=none,bus=0,unit=0 -device ide-hd,drive=d0,bus=ide.0

    I was able to connect to the network using virt-manager… and from there I got this long call to qemu:

    qemu-system-x86_64 \
    -enable-kvm \
    -name guest=generic,debug-threads=on \
    -S \
    -object secret,id=masterKey0,format=raw,file=/var/lib/libvirt/qemu/domain-5-generic/master-key.aes \
    -machine pc-i440fx-yakkety,accel=kvm,usb=off \
    -cpu Broadwell-noTSX \
    -m 1024 \
    -realtime mlock=off \
    -smp 1,sockets=1,cores=1,threads=1 \
    -uuid 062afe50-1e83-4c7a-a16a-e3078d53dd63 \
    -no-user-config \
    -nodefaults \
    -chardev socket,id=charmonitor,path=/var/lib/libvirt/qemu/domain-5-generic/monitor.sock,server,nowait \
    -mon chardev=charmonitor,id=monitor,mode=control \
    -rtc base=utc,driftfix=slew \
    -global kvm-pit.lost_tick_policy=discard \
    -no-hpet \
    -no-shutdown \
    -global PIIX4_PM.disable_s3=1 \
    -global PIIX4_PM.disable_s4=1 \
    -boot strict=on \
    -device ich9-usb-ehci1,id=usb,bus=pci.0,addr=0x6.0x7 \
    -device ich9-usb-uhci1,masterbus=usb.0,firstport=0,bus=pci.0,multifunction=on,addr=0x6 \
    -device ich9-usb-uhci2,masterbus=usb.0,firstport=2,bus=pci.0,addr=0x6.0x1 \
    -device ich9-usb-uhci3,masterbus=usb.0,firstport=4,bus=pci.0,addr=0x6.0x2 \
    -device virtio-serial-pci,id=virtio-serial0,bus=pci.0,addr=0x5 \
    -drive file=/home/nicopace/projects/redlibre/altermundi/librestack/lime-sdk/output/x86/generic/Generic/lime_default/lede-17.01.2-libremesh-x86-generic-combined-ext4.img,format=raw,if=none,id=drive-ide0-0-1 \
    -device ide-hd,bus=ide.0,unit=1,drive=drive-ide0-0-1,id=ide0-0-1,bootindex=1 \
    -netdev tap,fd=26,id=hostnet0 \
    -device e1000,netdev=hostnet0,id=net0,mac=52:54:00:86:34:95,bus=pci.0,addr=0x3 \
    -netdev tap,fd=28,id=hostnet1 \
    -device e1000,netdev=hostnet1,id=net1,mac=52:54:00:86:8b:58,bus=pci.0,addr=0x8 \
    -chardev pty,id=charserial0 \
    -device isa-serial,chardev=charserial0,id=serial0 \
    -chardev spicevmc,id=charchannel0,name=vdagent \
    -device virtserialport,bus=virtio-serial0.0,nr=1,chardev=charchannel0,id=channel0,name=com.redhat.spice.0 \
    -spice port=5900,addr=127.0.0.1,disable-ticketing,image-compression=off,seamless-migration=on \
    -device qxl-vga,id=video0,ram_size=67108864,vram_size=67108864,vram64_size_mb=0,vgamem_mb=16,max_outputs=1,bus=pci.0,addr=0x2 \
    -device intel-hda,id=sound0,bus=pci.0,addr=0x4 \
    -device hda-duplex,id=sound0-codec0,bus=sound0.0,cad=0 \
    -chardev spicevmc,id=charredir0,name=usbredir \
    -device usb-redir,chardev=charredir0,id=redir0,bus=usb.0,port=1 \
    -chardev spicevmc,id=charredir1,name=usbredir \
    -device usb-redir,chardev=charredir1,id=redir1,bus=usb.0,port=2 \
    -device virtio-balloon-pci,id=balloon0,bus=pci.0,addr=0x7 \
    -msg timestamp=on

    I need to distill the relevant information from there.

    With that last config and using an ui option in virt-manager, I was able to access the usb device TP-Link TL_WN822Nv1 on the Virtual Machine, but I was not able to use it yet because of driver problems.

    Have to keep digging into that.

    If you have any idea on how to do this better, please write in the comments.

    Pub/Sub messaging over ubus with Lua

    In my GSoC project (more about this here) I need to do a lot of ubus use.

    In this case, I want to connect a series of services in a publish-subscribe model.

    I want to thank Commodo for his ubus examples… I will be showing a similar example that you can test to have a publish-subscribe pattern implemented in ubus and lua.

    In a publish-subscribe you have two type of agents: publishers and subsribers.

    Publishers send messages tagged with a specific topic.

    Subscribers wait for messages about a specific topic.

    Tue Bus is in charge of routing messages based on the topic from publishers to subscribers.

    In our case, ubus will act as the Bus.

    Here is the code:

    First, the publisher:

    And this is the subscriber:

    I still have to figure out how it works… will expand this post once I finish understanding everything.
    In particular, I still don’t understand how the notify send an event with a “test.alarm” topic, but the subscribe just listens to “test”… maybe is listening to everything that starts with test.

    Easy ubus Daemons with rpcd

    Libremesh /etc/banner

    In this article we will see how to create a simple ubus daemon with RPCd.

    Ubus is an amazing piece of software that allow inter-process communication inside and in between nodes.

    For inter-process communications it uses a common bus with synchronous and asynchronous calling, publish/subscribe and event paradigms.

    For in-between nodes communication it provices a JSON-RPC 2.0 Server (and I hope will do WebSockets soon!).

    For more information on how ubus works check out OpenWRT’s Wiki page.

    If you want to expose simple functionality to ubus (or you are prototyping an interface before creating an efficient daemon) you can use rpcd for this.

    This is a simplified example based on the one in the wiki

    $ cat << EOF > /usr/libexec/rpcd/banner
    #!/bin/sh
    
    # The RPCd interfaces with commands via two methods: list and call.
    case "$1" in
    	list)
                    # List method must return the list of methods and parameters that the daemon will accept. Only methods listed here will available to call.
    		echo '{ "append": { "content": "str"}, "show": { } }'
    	;;
    	call)
                    # The way rpcd calls the methods is by calling your script like this: <script-name> call <method-name> << <json-input>
                    # So, in order to retrieve the called method, you need to read $2
    		case "$2" in
    			append)
    				# And in order to retrieve the method parameter, you need to read stdin
    				read input;
                                    CONTENT=`echo $input | jsonfilter -e '@.content'` 
                                    echo $CONTENT >> /etc/banner
    				echo '{ "result": "ok" }'
    			;;
    			show)
    				# return json object or an array
    				echo -n '{ "content": "`; echo $(cat /etc/banner | text_to_json); echo '"}'
    			;;
    		esac
    	;;
    esac
    
    function text_to_json() {
    JSON_TOPIC_RAW=`echo $1`
    JSON_TOPIC_RAW=${JSON_TOPIC_RAW//\\/\\\\} # \ 
    JSON_TOPIC_RAW=${JSON_TOPIC_RAW//\//\\\/} # / 
    JSON_TOPIC_RAW=${JSON_TOPIC_RAW//\'/\\\'} # ' (not strictly needed ?)
    JSON_TOPIC_RAW=${JSON_TOPIC_RAW//\"/\\\"} # " 
    JSON_TOPIC_RAW=${JSON_TOPIC_RAW//   /\\t} # \t (tab)
    JSON_TOPIC_RAW=${JSON_TOPIC_RAW//
    /\\\n} # \n (newline)
    JSON_TOPIC_RAW=${JSON_TOPIC_RAW//^M/\\\r} # \r (carriage return)
    JSON_TOPIC_RAW=${JSON_TOPIC_RAW//^L/\\\f} # \f (form feed)
    JSON_TOPIC_RAW=${JSON_TOPIC_RAW//^H/\\\b} # \b (backspace)
    echo JSON_TOPIC_RAW
    }
    EOF
    $ chmod +x /usr/libexec/rpcd/banner
    $ service rpcd restart

    And then we can try the new daemon:

    $ ubus -v list banner
    'banner' @xxxxxxx
        "append":{"content":"String"}
        "show":{}
    
    $ ubus call banner show
    LEDE blah blah
    ...
    
    $ ubus call banner append 'Hello world!'
    LEDE blah blah
    ...
    Hello world!

    Update:
    @Rundfreifunk comment suggested that if you want to use this RPC commands via JSON-RPC, you need to add authentication parameters.
    In this case, let’s suppose that we want to grant anonymous read access to the banner.show method.

    We could do that like this:

    $cat << EOF > /usr/share/rpcd/acl.d/banner.json
    {
      "unauthenticated": {
        "description": "Alfred data types via batman-adv meshrouting",
        "read": {
          "ubus": {
            "banner": ["show"]
          }
        }
      }
    }

    The documentation related to ACLs can be found in this OpenWRT wiki page.

    GSoC 2017 – RetroShare mobile improvements – First evaluation update

    Hi all!
    This first GSoC coding period has been very productive!
    The big part of the work has been focused into the program usability and aesthetics.
    To report just some of the improvements done in this area the chat messages are now wrapped in beautyful bubbles, the contacts view has been refactored to show more info like the last message or if there is unread messages, the node details view has been redesigned to be more appealing, the contact details view show the avatar, and a  more appealing menu is in progress (see screenshots at the end of the post).
    For this implementation I needed to learn how to work with qml, how the RetroShare API works, to make calls and process the JSON API answers.
    Also I have managed to create a simple chat informations cache, to store useful data that I use in the views without asking them via the API again and againAnother part of work done is about how to interact with the Android systemFor example sending notifications from the QML application to the Android systemor getting the internet connection status and details from the Android system.
    The most difficult part has been grasping, how to call QML code from Android Java and vice versa. I have been learning JNI (Java Native Interface) and Qt on Android multithreading model now I am capable to call Java code from Qml and vice versaIn one direction you call java functions form QML, always througth C++, in the other direction, you call a QML functions from Java, also via C++. The trickiness is not only limited to the fact that the comunication must be intermediated by C++, the fact that the QML code and the Java code run in indipendent threads is to be taken in account too, hopefully Qt provide some functions that make thing seamless in most of the cases. 
    Finally, I have achieved to create Android notifications and get the connection status on Android devices. This second will be very usefull to decide how the core should behave, for example, if we have only 3G connection, is probably better to not forward the Retroshare GXS tunels and save your download quota. Instead, if you have a fast wifi connection, the Retroshare core can work at full capacity and contribute to Retroshare network. 
    In the following month, I’m going to work testing the usability improvements in Android device because this branches have been developed and tested mostly in desktop enviorment. This is posible thanks to the Qt multiplatform system: running the Android service on desktop to start the Retroshare core and then run the QML-app is almost the same as doing it on a smartphone.
    Another direction of work for next period is to improve the comunication with the Android system. Taking advantage of the posibility to call Android Java code we can improve the app behavior in many cases (I have explained just a few of them above).
    As always I push the code daily on my gitlab mirror
    Cheers!


    GSoC 2017-netjsongraph.js milestone 1

    netjsongraph.js(GitHub) is a visualization library for NetJSON. During the first month, gratifying results have been achieved. I have done most tasks for the first stage of netjsongraph.json. Thanks for the nice mentor and this great chance to let me learn a lot of skill and techniques. Here are some results:

    Minor version published

    Npm is currently the largest open source package management community, it is very convenient for developers to release or iterative update netjsongraph.js.

    Development workflow imporved

    I have imported some modern front-end development tools to simplify the development process, including webpack (build tool), yarn (package management), babel, eslint, jest (test framework). Developer can run or test the project by one line command. all tools are advanced and familiar to JS developers, so they can contribute more easily.

    Rewrited visualization by webGL

    I had developed three demos with three different technologies: Sigma.js, Pixi.js and Three.js.
    Sigma.js code looks very concise, but importing of its plugins (such as force layout plugin) in modern way is so hard. Pixi.js and Three.js I used it only to render d3 force layout. And three.js looks slow than Pixi.js but its slowness may caused by lines render way.
    But I finally decide d3 4.0 and three.js is the best choice currently. Because they are both famous and iteration rapidly. Pixi.js is also great but it only support 2d render, so if we want to expand our visualisation to 3D in the future, we can only choose three.js. Three.js is a library which lightweight webGL packaging in order to avoid writing WebGL directly that is very hard and verbose.
    Then I refactored the demo to a Class and write some API backward compatible, including function to fetch data, theme switching, autosize, metadata and nodedata panel and zoom, hover, click event handler. It looks like:
    netjsongraph.js
    Metadata and node data panel are on top left and right corner, force graph for Netjson visualization in the center.

    Tests added

    Some unit tests have beed added and CI has beed integrated by Travis and Coverall. Because I wrote tests rarely before, so I meet some trouble and read a lot docs and examples to learn how to write test and how to use Jest. One problem I’ve met is test failed when import object with WebGL renderer. I’ve send a issue: https://github.com/facebook/jest/issues/3905 .

    Next stage

    I will complete the compatible API in the next week, and below are tasks for next milestone:

    • add optional geographic map
    • add a way to redraw graph by supplying new data
    • add more interactions
    • improve force layout details

    Conclusion

    Next version which have more interaction and rendered by WebGL is comming soon. and it will be soon integrated in the brand new OpenWISP 2 Network Topology module.

    During this period I learned a lot of things, including how to use git rebase, how to write commit messages more clearly, how to write test, KISS principles, worse is better principles and so on. Great thanks for GSoC, Freifunk and mentor Federico.

    TDD and Unit Testing in Lua: The OpenWRT/LEDE case

    A lot of code has been written, and none of the LUA code written for OpenWRT/LEDE (at least on my knowledge) uses testing as a way of verifying the quality of the code.

    I want to use this approach as it has proven useful for other projects.

    If you are interested in understanding what TDD is, here there is a little excerpt from one of Uncle Bob’s explanations of how TDD works: https://www.youtube.com/watch?v=GvAzrC6-spQ

    In order to do testing on this platforms, the library should not require LuaROCKS (because the default development environment does not require it).

    Let’s see what LUA has to offer in this area.

    Lua Unit Testing Libraries

    Thankfully, Lua wiki is an amazing source of information. You can find information about unit testing over here: http://lua-users.org/wiki/UnitTesting

    There are many Lua Unit Testing libraries, but for what I understood the most used is Luauit, so I will try to work on an example and share it with you ASAP.

    Lunitx: a good contender

    There is also a guy that did a review on the available tools: http://web.archive.org/web/20141028091215/blog.octetcloud.com/?p=32

    His concern was not in the context of OpenWRT/LEDE, so there are things that need to be considered that don’t apply for him.

    He basically saw that lunit was good, but needed some tweaks, to he forked it into lunitx… which was forked again and this is the outcome: https://github.com/dcurrie/lunit

    Conclusions

    These seems to be the mos viable options.

    I’ll be testing these during the next days.

    If you have any suggestion or comment, please leave it below.

    geolocator (Software defined GPS) first evaluation

    Hi together,
    Now I am coming to my 1 phase: evaluation. An introduction into the geolocator (Software defined GPS) has been already done last month. You can find it here [0]. In the previously mentioned blog post I have told about the 3 main sub-projects: web backend, gps-share, LEDE Package. In this post I will show you what I have done in each sub-project. Beginning with the web backend:

    web backend

    This sub-project should replace the old web backend of the openwifi.su project. 
    The old backend is split into various programs and scripts, grown over years. First of all I started with the part of receiving positions. This program is written in ruby and just parses the URL as a string. So users can simply call
    wget -O - http://openwifi.su/api/v1/bssids/64700274945A,0018E7DC21BB,30FC681F37A6,F81A673626E8,EC086BA8ED18,8416F9A8E2FA,E894F6A230E4,98DED020D00A,EC086B3349B2,F81A677F5CD8,A0F3C1654BA6 2&>1
    and will receive latitude and longitude. The BSSIDs in the above URL are from surrounded WiFi networks. The old ruby code just drops all characters up to the last splash and splits the BSSIDs by comma. The result array will be integrated into and SQL command which returns a position for each BSSID. The code for this part is non public, because the developer doesnt want to risk attacks by hackers. I started porting the old ruby code to golang. Currently I am working on the database connection. So in the next few days the backwards compatibility will be finished. The current code can be found here [1].

    gps-share

    gps-share is a software which provides GPS informations in the local network, written in rust [2]. It supports many GPS hardwares and shares the GPS informations over a network-NEMA format. Zeeshan Ali, the maintainer of geoclue, has already released a first version of gps-share [3]. Zeeshan and I discussed on the Mozilla Location Service Mailing-list about that project [4] . As I told it in the last blogpost, the gps-share is an alternate project to the original idea. This helps geoclue to work directly with GPS-hardware´s and builds an defined interface via dbus to receive geopositions over GPS hardware, surrounding WiFis or other ways.

    LEDE Package

    The last  sub-project is a new LEDE-package, which provides geo positions received by their surrounding WIFIs. I have already built a first version of that package here [5]. I also started discussing with maintainers of the gluon framework, which is a popular framework in the Freifunk community. My plan is to integrate the goelocator also in gluon so routers can automatically receive its position. A first draft can be seen here:

    An idea is that the Web interface of the router could detect installed packages and provide their options on the Web interface. This means, that in the drop down menu, the option “Automatic (geolocator)” will only be shown if the package geolocator is installed. This makes it easier for local (freifunk) communities to integrate new options of position detection into their firmware.
    This is also my last week of my exam period. Now I can work full time on the project. Next plans are improving functionality of the new backend, building CI unit test for the new planed API and building the Mozilla Location Service communication interface to sync the requests between MLS and openwifi.su.