Finishing an app for network capability for the LibreMesh OS

Hi! I’m Tomás on my last post about the LibreMesh Application (now just LimeApp). It was really fun to work with Altermundi on this project and I like the results that we achieve. I hope that everyone enjoys this post just like I enjoyed working on the application! So, let’s get started.

Finished the first part of the GSoC we started to build the next version of the app (1.0).

Resume

As a resume, the objectives for this part are:

  • Do a correct use of threads trying to avoid interruptions to the user.
  • To implement a new Graphical User Interface with the capability of returning messages to the user about the situation of the network (for example, could the app connect to thisnode.info? No? Why?).
  • Add the app to the LibreMesh Operating System.

Fixing the HTTPGet

First things first the previous app had a bug discovered at the first meeting of the second part. If someone has a server on the address thisnode.info the connection could be reached and, in this case, the app shows that the connection to LibreMesh was correct in all the possibles cases.

So, the solution is to do an HTTPGet to thisnode.info. There’s an interesting answer in StackOverflow about this topic:
https://stackoverflow.com/questions/2793150/how-to-use-java-net-urlconnection-to-fire-and-handle-http-requests

So, we will only focus on getting an HTTPGet, so with the tools that we got from the article, I built this code:

StrictMode.ThreadPolicy policy = new StrictMode.ThreadPolicy.Builder().permitAll().build();
StrictMode.setThreadPolicy(policy);

try {
    connection.getInputStream();
    return true;
} catch (IOException e) {
    e.printStackTrace();
    return false;
}

Using threads

This code looked fine but there’s one thing that wasn’t correct according to the Android specifications. There’s a permitAll in the policy. This means that connections can happen in the principal thread of the application. To publish in the play store, we needed to change this and create a thread to run the HTTPGet, so the code now looks like this:

boolean[] success = {false};

Thread connectionThread = new Thread(new Runnable() {
    public void run() {
        try {
            connection.getInputStream();
            success[0] = true;
        } catch (IOException e) {
            e.printStackTrace();
            return;
        }
    }
});

    connectionThread.start();
    connectionThread.join();

    return success[0];

This isn’t the best example of a Thread cause doesn’t work concurrently, but it helps the app to respect the Android specification.

Thanks to our testers, we discovered that there was a problem with the latest Androids version that required too many permits to access the SSID or even the ID of the WiFi, so we decided to disable the verification that used these attributes in the latest version of Android

public static boolean verifyWifiConnection(WifiManager wm) {
    if(Build.VERSION.SDK_INT <= Build.VERSION_CODES.P)
        return wm.isWifiEnabled() && wm.getConnectionInfo().getNetworkId() != -1;
    return wm.isWifiEnabled();
}

Also, we needed to add the attribute android:usesCleartextTraffic=”true” in the Android Manifest because the latest Android version doesn’t allow HTTP sites on WebView.

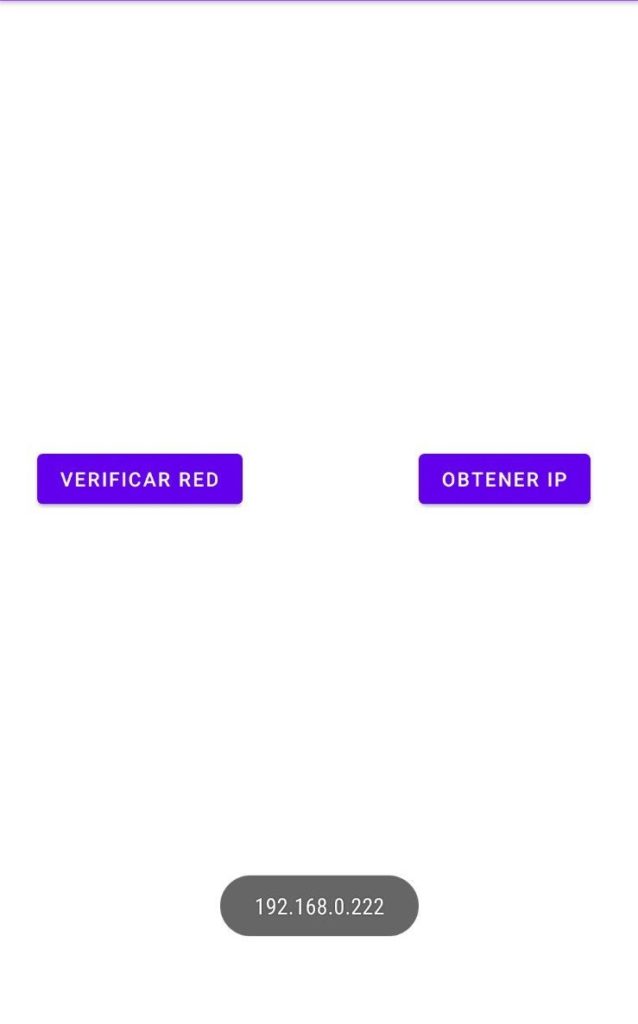
Finally, we added an error screen and changed the use of the app from three buttons to an “automatically display” of the Lime-App, or an error message.

Graphical interface

We wanted to maintain the app light, so the graphical interface needed to be only two screens:

  • One with the WebView that access to the LibreMesh configuration.
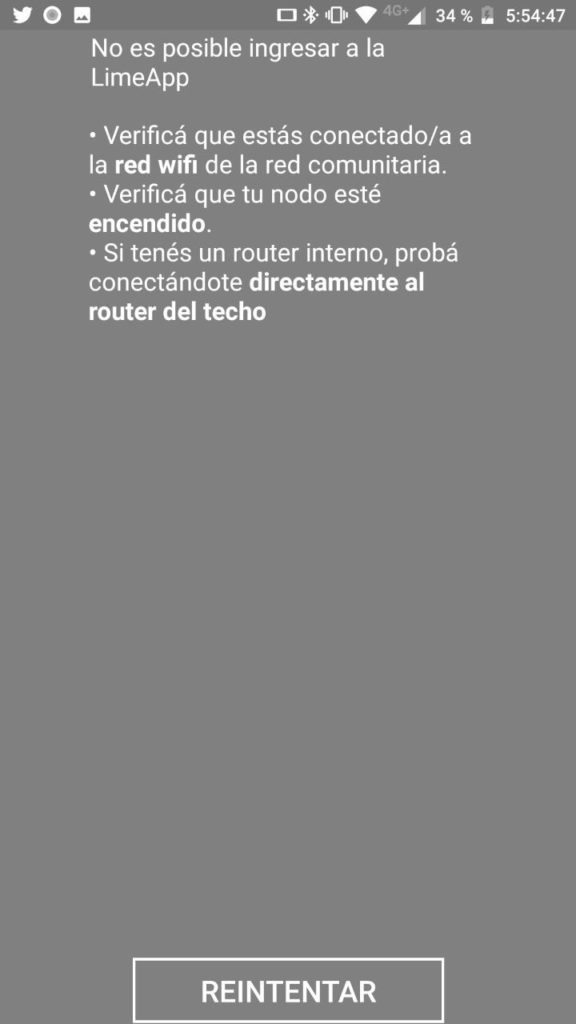
  • Other one with an error and some tips to fix it.

So, with these use cases, we created an error screens that looks like this:

Error screen of the LimeApp

And here’s a video of how’s the app working:

Unit testing

With all the problems solved and the testers using the prerelease version, we added some unit testing using Mockito. This is an example of a Unit Test of a correct connection to the app:

@Test
public void correctConnection() {
    when(wm.isWifiEnabled()).thenReturn(Boolean.TRUE);
    when(wm.getConnectionInfo()).thenReturn(wi);
    when(wm.getConnectionInfo().getNetworkId()).thenReturn(1);

    try {
        when(urlc.getInputStream()).thenReturn(null);
    } catch (IOException e) {
        fail();
    }

    MainActivity ma = new MainActivity(wm, urlc);

    assertEquals(true, ma.accessToLibreMesh());

}

This test uses mocked objects to simulate a response and then it executes the function. We plan to add in the close future Integration tests.

Reducing the app size

One of the objectives that we set for the second part of the GSoC was to reduce the APK size to add the app to the LibreMesh OS. The original size was 2.91 MB and knowing that a LibreRouter has 8 MB of total space, uploading the app means to use 36% of the node space.

The first attempt to reduce the APK size was to start using the “Generate APK” function of Android Studio instead of using the debug APK. This is also needed to sign the app to publish in the Play Store. This reduced the size from 2.91 MB to 2.42 MB.

This reduction was great but isn’t enough, so we started using the tips of the ApkGolf project (https://github.com/fractalwrench/ApkGolf/b) to reduce the space. In an ideal case, we could use all of them, but we wanted to maintain things like a Constricted Layout for the Error message.

We started adding some lines to the build.gradle that add scripts that help to reduce the code and resources size.

buildTypes {
    release {
        minifyEnabled true
        shrinkResources true
        proguardFiles getDefaultProguardFile('proguard-android-optimize.txt'), 'proguard-rules.pro'
    }
}  

(The proguardFiles were already in the code, but also helps in the size reduction).

Another interesting setting is the resConfig. The library imports usually bring support for multiple languages. We’re currently using Spanish, so setting this to only one language reduce the size a little

resConfigs "es"

Another thing that reduces space is to convert the images to WebP (and accept a good percentage of reduction of quality). We also deleted some files and hard-coded things like the colors (to remove de .xml).

The file that occupies the most space is the one that’s related to classes (ours and imports), so the best way to reduce space use was to remove them. In the build.gradle there were a lot of imports that we added in some moment, but we removed the use of them, so remove also from the build.gradle was a good idea.

They were particularly two interesting dependencies:

implementation 'androidx.appcompat:appcompat:1.2.0'
implementation 'com.google.android.material:material:1.2.1'

The first one was added by Android Studio and we didn’t use it, but the second one was an addition to the design of the application. We removed the calls to the import and the dependency. That reduced approximately 400 KB of space.

At the end of the process, the APK size is 730,337 KB, this means a reduction of approximately 85% of space use.

Finally, we decided to publish a close version to the Play Store because all the main objectives were completed. Currently, we’re waiting for Google to finish the revision on the App.
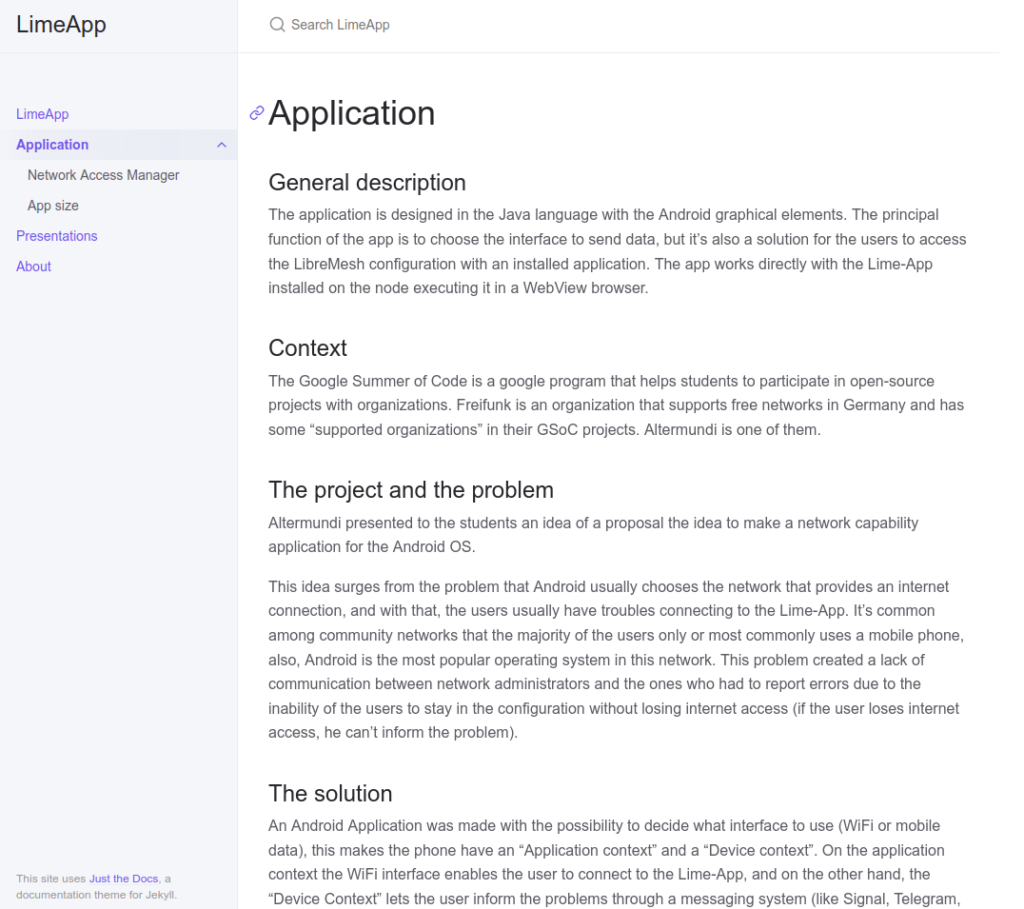
Jekyll page

We’ve also added a Jekyll page for the project (available on Github) that shows some information about the application and the problem that solves.

Github page of the project

Link to the Github project

I’m really happy with the work that we did during this GSoC and I’m glad that this application is going to help Community Networks around the world. Thanks to all for letting me be part of this great community and especially to Nicolas Pace and Germán Ferrero for all the support that they gave me during this two months. Greetings and I hope that I can help with other open-source projects in the future!

Building an app for network capability

This image has an empty alt attribute; its file name is AlterMundiInicio.png

Building an app for network capability

Hi! I’m Tomás. This post is a brief of the work that we did in the last few weeks. The prototype of a network capability app was achieved, and we’re starting to test it on communities. The app is still a prototype: it has only three functions (connect to a webpage using the WiFi, check if you’re in a LibreMesh network, and check the private IP of the device) and the front-end consists of only these three buttons, but it has now all the logic that was needed to start working on the rest of the app.

Basic functions

The first approach was to check if the user was able to connect to the LibreMesh local address by checking it with a ping, and then we decided to move forward to an HTTP GET instead. With this idea in mind, we prepared a new version of the application that sends a command to the device (a curl command) instead of a Java method with a previously developed android interface (for the ping version).

public boolean httpGetToLibreMesh() throws InterruptedException, IOException {
    //FIXME: modificar google por la IP de LibreMesh
    String[] cmdLine = {"sh", "-c", "curl --head --silent --fail google.com"};
    Process p1 = java.lang.Runtime.getRuntime().exec(cmdLine);
    int returnVal = p1.waitFor();
    return returnVal == 0;
}

This simple code solves the problem. It returns true if the HTTP GET to google.com worked, and false if it didn’t. It can be easily modified with the LibreMesh IP Address.

The next objective was to inform the user if the device wasn’t connected to the WiFi. In order to do so, we have to get the WifiManager from the ApplicationContext, and then check if the wifi is working.

public boolean verifyLibreMeshConnection() {
    WifiManager wm = (WifiManager) getApplicationContext().getSystemService(WIFI_SERVICE);
    if(wm.isWifiEnabled()) {
        return (wm.getConnectionInfo().getNetworkId() == -1) ? false : true;
    }
    return false;
}

Then, we needed a web navigator (WebView) inside the app with the capability to run the LibreMesh router website (On the first approach, to a google.com website).

Using a WebView object with the shouldOverrideUrlLoading overridden we can show a webpage in the app without the requirement of showing an external navigator (Android provides the Android WebView App that does this inside the LibreMesh app).

So with this simple code, we can configure the WebView to enter to a site inside the app.

WebView navegador;
navegador = (WebView) findViewById(R.id.navegadorLibreMesh);
navegador.setWebViewClient(new WebViewClient() {

@Override
public boolean shouldOverrideUrlLoading(WebView view, String url) {
    view.loadUrl(url);
    return true;
}
});
navegador.loadUrl("http://www.google.com");

Choosing through which network interface to send data to

Once having the WebView, the next step was to control through which network interface the application sends the network requests. In order to do that we have to access the ConnectivityManager. It was created as a class variable and defined on the function “onCreate” of the activity that holds the WebView. The connectivityMaganer isn’t a new instance but a reference to the object that controls the connections in the context of the App.

connectivityManager = (ConnectivityManager) getApplicationContext().getSystemService(Context.CONNECTIVITY_SERVICE);

Then we needed a function that can request to use the WiFi. The idea is to make a NetworkRequest and send it to the connectivityManager, but it also needed a NetworkCallback to specify what to do when the Network was available to accomplish the request. So as a second parameter of the request there’s an anonymous class that overrides the methods needed.

@RequiresApi(api = Build.VERSION_CODES.LOLLIPOP)
private void requestWifi() {
    final NetworkRequest networkRequest = new NetworkRequest.Builder()
           .addTransportType(NetworkCapabilities.TRANSPORT_WIFI)
           .build();

    connectivityManager.requestNetwork(networkRequest, new ConnectivityManager.NetworkCallback() {
        @Override
        public void onAvailable(Network network) {
            if(Build.VERSION.SDK_INT >= Build.VERSION_CODES.M)
                connectivityManager.bindProcessToNetwork(network);
            else
                ConnectivityManager.setProcessDefaultNetwork(network);
        }

        @Override
        public void onLost(Network network) {
            if(Build.VERSION.SDK_INT >= Build.VERSION_CODES.M)
                connectivityManager.bindProcessToNetwork(null);
            else
                ConnectivityManager.setProcessDefaultNetwork(null);
        }

        @Override
        public void onUnavailable() {
            super.onUnavailable();
        }
    });
}

The last thing that I needed to do was a function that runs the WebView.

private void iniciarNavegador() {
    if (Build.VERSION.SDK_INT >= Build.VERSION_CODES.LOLLIPOP) requestWifi();

    WebView navegador;
    navegador = (WebView) findViewById(R.id.navegadorLibreMesh);
    navegador.setWebViewClient(new WebViewClient() {

       @Override
        public boolean shouldOverrideUrlLoading(WebView view, String url) {
            view.loadUrl(url);
            return true;
        }
    });
    navegador.loadUrl("192.168.0.2");
}

Getting the LibreMesh address

The next step was to move forward with getting the LibreMesh IP address. On the other hand, that’s not more than just an algorithm or a gateway, either way, does the same results. This can give us an alternative way to see if the user is connected or not to the LibreMesh server (we get the IP through the algorithm and compare the gateway version).

The idea was pretty simple and only required a int to ip auxiliar function. So we decided to collect all the methods that returned wifi information and send them to a new WifiInformationManager class. So, this class sends all the information that we need from the WiFi:

public class WifiInformationManager extends AppCompatActivity {
    private static String intToIp(int addr) {
        return  ((addr & 0xFF) + "." +
                ((addr >>>= 8) & 0xFF) + "." +
                ((addr >>>= 8) & 0xFF) + "." +
                ((addr >>>= 8) & 0xFF));
    }

    public static String getPrivateIp(WifiManager wm) {
        int ip = wm.getConnectionInfo().getIpAddress();
        return intToIp(ip);
    }

    public static boolean verifyWifiConnection(WifiManager wm) {
        if (wm.isWifiEnabled()) {
            return wm.getConnectionInfo().getNetworkId() != -1;
        }
        return false;
    }

    public static String getGateway(WifiManager wm) {
        return intToIp(wm.getDhcpInfo().gateway);
    }

}

The function getGateway solves in an elegant way the problem of the LibreMesh Local-Address. The rest of the job was simply to change the address of the WebView to this one.

Using logcat to find bugs

The logic step then was to try the application and test if it worked okay, but when we did that the WebView that shows the Lime-App showed a white screen instead. Using the logcat inside the Android Studio we were able to easily find the error, showing the importance of using this type of debugging tools.

Using the logs it’s easy to see that there’s a TypeError when trying to get the property ‘getVoices’. The problem comes with the plugin ‘window.speechSynthesis’ that isn’t available for some browsers.

The Lime-App is the graphical interface that LibreMesh uses for the configuration of community networks. We found the .js that was calling the function:

let synth = window.speechSynthesis;
let voices = synth.getVoices();

export const speech = (text, lang) => {
let utterThis = new SpeechSynthesisUtterance(text);
utterThis.pitch = 0.9;
utterThis.rate = 1.2;
utterThis.voice = voices.filter(x => x.lang === lang)[0];
synth.cancel();
synth.speak(utterThis);
};

It can be seen that in the line 2 the variable voices is set to a synth.getVoices, but if synth is undefined, then that line will not succeed.
The solution was pretty simple, with a control structure we check if the speechSynthesis was available or not. So the fixed code is:

let synth = window.speechSynthesis;

export const speech = (text, lang) => {
if(synth != "undefined") {
let voices = synth.getVoices();
let utterThis = new SpeechSynthesisUtterance(text);
utterThis.pitch = 0.9;
utterThis.rate = 1.2;
utterThis.voice = voices.filter(x => x.lang === lang)[0];
synth.cancel();
synth.speak(utterThis);
}
};

I sent a pull request to the Lime-App repository fixing this problem and it’s currently waiting to be merged.

Next steps

With the functions of detecting and configuring a libremesh network, we plan to add some features to the app the next weeks:

  • A better graphical interface with the integrations of all the planned functions of the app.
  • Support other services in addition to Lime-App.
  • Add the app to the LibreMesh operating system, giving the posibility to the user to obtain the app directly from the router.

Video

Github project

Android native app for network selection capability in LibreMesh routers – Overview

Hello! I’m Tomás Assenza. I work on the “Android native app for network selection capability in LibreMesh routers” project with the Altermundi association. I’ll talk about what Libremesh is and why we want to make an app for network selection.

Introduction

LibreMesh is an operating system that works on some Tp-Link routers and LibreRouters, and It’s a practical solution to provide networks to social organizations. These social organizations usually give access to the web to users that only had mobile data networks before. The most practical object that they generally use is a smartphone to connect to the LibreMesh routers.

The issue

Android usually does a “network switch” between Wi-Fi and mobile data considering if the first one provides or not the Internet. The problem with this feature is that if the users have an internet problem, they would not have the possibility to access some LibreMesh internal address to know the trouble and report it to the organization.

We have the idea to solve this problem through an application with the capability To select from which network it sends and receives data from, making possible the connection between the smartphone and the router even when there isn’t an Internet connection.

Who am I? What are my motivations for the project?

I’m a System Engineering student at the Santa Fe Regional of the National Technological University (Universidad Tecnológica Nacional – Facultad Regional Santa Fe). I work as a young teacher of the subject “Algorithms and Data Structures” and in two R+D projects, one about making software tools for programmers with visual disabilities and the other one about developing online simulators for the subject of ‘Chemistry’ by helping the students to experience chemical experiments even during the Covid-19 pandemic.

I always liked to learn how digital communications worked, but they also seemed far away from my profession and career. Considering this, I thought that the GSoC was an opportunity to learn new concepts and help communities with open-source software.

First meeting and objectives for this week

During the last week, we did a meeting to establish objectives for this week. These are:

  • Install the Android Studio IDE.
  • Make an application that can show the local address of the device.
  • Make an application that can show if the device is connected or not to the LibreMesh network (simulating through a ping to a random address).

And the results are:

Github Project

Next objectives:

  • Change the ping-based detection.
  • Define a strategy to connect to the router in case that the app detects that the device is or not connected to the LibreMesh network.
  • Define the scope of the app