“Das größte Bürgernetz Deutschlands” – Freifunk in der c’t 17/2019

In ihrer aktuellen Ausgabe 17/2019 berichtet die c’t ausführlich über das Freifunk-Projekt. Der Themenschwerpunkt umfasst insgesamt vier interessante Artikel:

Das größte Bürgernetz Deutschlands

“Freifunk: Das größte Bürgernetz Deutschlands” beschreibt das Projekt aus User-Sicht. Der Artikel erläutert, wie Freifunk-Netze technisch aufgebaut werden können und wie sich Nutzerinnen und Nutzer mit ihnen verbinden. In seinem Beitrag stellt Andrijan Möcke Freifunk einem kommerziellen Hotspot-Provider gegenüber. Jedoch übersieht er, dass es bei Freifunk nicht nur um kostenlosen Internetzugang geht sondern um viel mehr: Wir bauen gemeinsame ein freies und selbstverwaltetes Funknetzwerk, das alle Menschen in meiner Umgebung miteinander verbindet und das von niemandem einfach abgeschaltet werden kann – so Lisa im Video Freifunk verbindet.
Freifunkas bauen nicht ihr Hotspot-Netz – sie befähigen Menschen es selber zu tun: Im Kern stehen Erfahrungsaustausch und Wissensvermittlung. Gemeinsame Projekte gibt es z.B. mit der CryptoParty, Chaos macht Schule, einigen CCC-Erfas und dem Jugendnetz Berlin. Ein DIY-Ansatz ohne Hotline und Vertrag ist kaum mit Service-Anbietern vergleichbar; die Community hofft auf Engagement bei ihren Projektzielen. Die vielen Verweise auf Vereine zur Teilnahme überraschen zudem: Den mehreren hundert losen Communities stehen nur etwa 50 Vereine gegenüber.

Haftungsentspannt – Ihr Gastnetz, Freifunk und die Störerhaftung

Der Rechtsanwalt Nick Akinci gibt in seinem Beitrag “Haftungsentspannt Ihr Gastnetz, Freifunk und die Störerhaftung” eine juristische Einschätzung zum Betrieb von Freifunk Routern und offenen Funknetzen. Hierbei geht er insbesondere auf die Situation nach dem Ende der Störerhaftung für WLAN-Betreiber ein. Neben Nick Akincis liefert Reto Mantz in seinem Blog “Offene Netze und Recht” weitere Einschätzungen und Hintergründe. Reto arbeitet als Richter am Landgericht Frankfurt am Main und beschäftigte sich u.a. in seiner Dissertation mit Rechtsfragen in offenen Netzen. Seine Analyse “BGH „Dead Island“ – Wie der BGH zwar die Abschaffung der Störerhaftung (bei WLANs) bestätigt, ihr Grundübel aber weiter beibehält” gibt einen umfassenden Einblick in die derzeitige Situation bzgl. der Störerhaftung.

Einmal Hotspot, bitte!

Im dritten Artikel “Einmal Hotspot, bitte!” gibt Vincent Wiemann Kaufempfehlungen für Freifunk Router. Im direkten Vergleich stellt er fünf Geräte verschiedener Hersteller einander gegenüber. Er zeigt auf, dass ältere Geräte wie der Linksys WRT54G und der TP-Link TL-WR841N inzwischen über zu wenig Ressourcen für die immer größeren Freifunk-Netze verfügen. Getestet werden die TP-Links RE450 v1, Archer C7 v5 und Archer C50 v4 sowie die Ubiquiti AC Mesh und die AVM Fritzbox 4040. Die Empfehlung für den RE450 ist jedoch problematisch, da die Geräte der Serie zum Teil über zu wenig Arbeitsspeicher verfügen. In vielen Communities können zudem auch andere Geräte verwendet werden: Das OpenWRT-Projekt hat eine Liste mit z.B. Gluon kompatiblen Freifunk-Routern veröffentlicht.

Gemeinsam funken – Zu Besuch bei Freifunk-Communities in Stadt und Land

Zuletzt gibt Keywan Tonekaboni in “Gemeinsam funken – Zu Besuch bei Freifunk-Communities in Stadt und Land” einen faszinierenden Überblick über verschiedene Freifunk Communities und Projekte in Deutschland. Zu Beginn geht es zur Freifunk Community in Hanover im Hackerspace Leinelab – darauf führt die Reise zum Wireless Community Weekend, dem jährlichen Freifunk Community-Treffen in Berlin. Hier stellt Keywan Tonekaboni Gründerinnen und Gründer der Freifunk Bewegung vor. Zuletzt gibt es einen Einblick in den Netzausbau in Wittmund und das Richtfunk-Backbone an der Nordseeküste.

Insgesamt veröffentlicht der heise-Verlag ein gelungenes Bild von Freifunk, das bei vielen Interesse wecken dürfte. Vielen Dank dafür.

Kickoff Meetup Open Communication Community

Samstag, 23. März 2019, 12:00-18:00 Uhr @c-base

Open Communication Meetup

Wir treffen uns zum Experimentieren, Testen und Analysieren von internetunabhängigen Kommunikationsmöglichkeiten auf mobilen Geräten. In der Gruppe werden wir mobile Apps für peer-to-peer Netzwerke, Mesh-Kommunikation und delay-tolerante Netzwerke testen.

Dabei werden wir bereits bestehende Apps, Lösungen und Protokolle mit mehreren Geräten praktisch ausprobieren, analysieren und dokumentieren (z.B. Serval, Briar, Meshenger, Rumble, Wind, Chime, Clatter, etc.).

Wann: Samstag, 23. März 2019, 12:00-18:00 Uhr
Wo: c-base, Rungestr. 20, Berlin, siehe Karte >>
Wer: Alle die an mobiler, dezentraler Kommunikation interessiert sind! 

Das Meetup ist offen und kostenlos. Bringe deine mobilen Geräte mit!

Editierbares Organisationswiki: https://pad.open-communication.net/p/Meetup-24032019

Weitere Informationen werden schrittweise auf https://open-communication.net veröffentlicht.

ENGLISH


Saturday, 23 March 2019, 12pm-6pm @c-base

Open Communication Meetup

A meetup to experiment, test and analyze Internet independent communication possibilities on mobile devices. We will test mobile apps for peer-to-peer networks, mesh communication and delay tolerant networks as a group.

We will play and experiment with existing apps, solutions and protocols with many devices. To test, analyze and document them. e.g. Serval, Briar, Rumble, Meshenger, Wind, Chime, Clatter, etc.

When: Saturday, 23 March 2019, 12pm-6pm
Where: c-base, Rungestr. 20, Berlin, see map >>
Who: Everyone interested in decentralized mobile communication! 

The meetup is open and free of charge. Bring your mobile devices!

Further information will be announced on https://open-communication.net.

Organisational wiki: https://pad.open-communication.net/p/Meetup-24032019

Runderneuerung blog.freifunk.net

Unser Freifunkblog ist auf eine neue Plattform umgezogen. Das alte Drupal 6, das sein Lebensende längst erreicht hat und keine Updates mehr bekam, haben wir abgelöst und die Inhalte nach WordPress migriert. Nun ist das Blog mit neuer Technik unter der Haube und neuem Design für die nächste Zeit gerüstet. Der älteste Artikel im Blog ist im Übrigen über 11 Jahre alt und stammt aus dem Jahr 2005.

Zugang zum Blog

Alle Artikel, Schlagwörter und Autoren sind erhalten geblieben. Frühere Benutzer wurden wieder angelegt, nur die Passwörter  haben wir nicht übernommen. Die Anmeldung kann mit der beim alten Blog verwendeten Emailadresse erfolgen. Mit der “Passwort vergessen”-Funktion kann man ein gültiges Passwort erhalten. Bei Problemen mit der Anmeldung schreibt bitte eine Email an das Webteam (web(at)freifunk.net).

Wer noch keinen Account auf diesem Blog hat und einen hier Freifunkartikel veröffentlichen möchte wendet sich bitte auch an das Webteam. Gerade für communityübergreifende Themen eignet sich diese Plattform.

Aufräumarbeiten

Einige Bilder lassen sich leider nicht mehr auffinden, da sie extern eingebunden waren und nicht mehr online sind. Auch der in Drupal integrierte Editor hat manchmal ganz schön viel unsinnigen HTML-Overhead erzeugt und führt auch unter WordPress zu komischen Formatierungen. Diese ließen sich nicht automatisiert aufräumen, das ist wohl mal ein Thema für einen Editathon :).


Implementing Pop-Routing – Final Evaluation

Hello again, for two months I have been working on my project and I have achieved all the goals.

An alpha version of my program was released for the mid-term evaluation.Since then I have fixed all the bugs, packaged the program for OpenWRT, tested the code and written the documentation.

Everything is available on the GitHub repository [0]

I structured my work opening by issues for all the bugs I had to fix and for everything I wanted to improve. Then, I organized the issues in milestones. Milestone 0.1 [1] is the one that I had to complete to finish the project. When that milestone was closed I made the branch “v0.1” [2].

Tests

In order to be sure that my program worked correctly. I wrote a simulator in python. It’s made by a small server, with the same interface as OONF’s telnet plugin, and two python libraries written by my mentor: cn_generator [3] and pop-routing[4]. The first one generates synthetic graphs using the Cerda-Alabern[5] algorithm, the second one is a pop-routing implementation in python. In the server I implemented the commands to push the NetJson[6] topology and the ones to receive the timers values.

When prince requests a topology from my test program, cn_generator generates a random graph and pushes it back; meanwhile using the python implementation of pop-routing, the references values are computed. The values received from prince are then compared to ones calculated using python.

The goal of tests is to verify that the difference between the reference and the measured values is always less than 1%.

Measurements

I’m going to use my work to write my Bachelor Thesis, so I wanted to perform some measurements to check how well it worked.

My goal was to implement the algorithm on an embedded device, so I chose to measure the execution time on a “Ubiquiti Picostation M2HP” to see how well it was performing.

I branched Prince [7], modifying the code to measure the time needed to calculate the betweenness centrality and push it back along with the timers.

I used the graph generator to create graphs from 5 to 500 nodes, and I measured the time needed to compute with a sample every 10 nodes. For each sample I ran 5 tests, then calculating the mean and the standard deviation. The results are shown here:

As you can see from the graphic above, the computation time on the embedded device is quite good if we use the heuristic (8s for 100 nodes), it proved to be unusable without it (100s for 100 nodes)

OpenWRT Package

The last objective I gave myself in the previous post was to write a plugin for OLSRd. Since OLSRd isn’t maintained anymore – and since all the developers are working on OONF – I decided to focus on it while avoiding the plugin. Instead, I wrote a makefile and packaged prince for openWRT / LEDE. The makefile hasn’t been published yet in any openWRT feed, but it is hosted in my repository [8]. Instructions are available along with documentation.

Future Work

I’ll keep working on this project, mantaining the code and fixing the future issues. Since the graph-parser library is the last piece of code implemented in C++ and it depends on the Boost libraries, I’m looking forward to re-implement it in pure C.

One of my goals was also to run prince in my WCN (Ninux Firenze), but switching from OLSRd to OONF is taking more time than expected, so I’m hoping to try it in the future.

Gabriel

[0]: https://github.com/gabri94/poprouting/
[1]: https://github.com/gabri94/poprouting/milestone/1?closed=1
[2]: https://github.com/gabri94/poprouting/tree/v0.1
[3]: https://ans.disi.unitn.it/redmine/projects/cn_generator/repository
[4]: https://ans.disi.unitn.it/redmine/projects/pop-routing/repository
[5]: https://pdfs.semanticscholar.org/4ac8/05e7359c6b20c3cdd5da24284d3826b9609c.pdf
[6]: http://netjson.org/
[7]: https://github.com/gabri94/poprouting/tree/exec_time
[8]: https://github.com/gabri94/poprouting/blob/master/Makefile.openwrt

Powquty (PoWer Quality) – GSoC 2016

Dear Freifunkers,

Now that GSoC 2016 comes to its end, please allow me to update you on the powquty project. Despite some delays regarding the hardware, the goals set for GSoC 2016 have been reached. Here follows a picture that shows a compact demonstration for powquty.

Small Powquty Demonstration

The picture depicts the set-up for powquty, which consits of a LEDE based wireless router, connected to the PC over serial interface, where a Termial session of the router is running. The oscilloscope is attached via USB to the router. On the router’s terminal session we see that powqutyd has been started, with the correspondent messages shown on stdout. These message show the calculated power parameters.

Installation

For installing powquty follow these steps:

  • add the following line to your feeds.conf in your source directory:

src-git powquty https://github.com/thuehn/powquty.git

  • update the your feeds, then install powqutyd from feed
  • Include powqutyd in your config (make menuconfig) by choosing powqutyd from: Utilities –> powqutyd
  • Save and exit menuconfig  
  • Compile and install powqutyd
  • scp the ipk file to your router and install it
  • opkg install powqutyd_0.1-1_<target>.ipk

Note this package depends on the following libraries/packages, that have to be installed before installing powqutyd:

  • libmosquitto
  • libconfig
  • kmod-usb-acm (kernel module)

When successfull the powqutyd package will create:

  • the binary powqutyd in /usr/sbin
  • the configuration file in /etc/powqutyd/powqutyd.cfg

Usage
Before running powqutyd you need to configure it.

  • Powqutyd needs to read the measurement samples from the USB oscilloscope. The USB oscilloscope has to be plugged to the router before running powqutyd. The USB oscilloscope implements the USB Communication Device Class (CDC) device specification. This means that the kernel module kmod-usb-acm will recognize the USB oscilliscope once plugged and will create a tty device probably under /dev/ttyACM0. Depending on your setup this could be different. Check your system logs after plugging the USB oscilloscope to find out the actual path of the tty-device on your setup and adjust the path in the config file of powqutyd (/etc/powqutyd/powqutyd.cfg) accordingly. Note: if the tty-device is not set right the powqutyd will not start!
  • Powqutyd will send the calculated power quality parameters using MQTT-protocol to an MQTT-broker. This means that powqutyd requires IP connectivity between your router and the MQTT-broker. Of course this is given if you set up an MQTT broker on your router itself, but this is not a requirement, as long as the router has an IP connectivity to an MQTT-broker. For testing purposes we used mosquitto on the router as MQTT-broker. Depending on your setup you need to adjust the mqtt_host config option in your /etc/powqutyd/powqutyd.cfg accordingly. The mqtt_host config option is a string that could contain either the IP-address of the Fully Qualified Domain Name (FQDN) of the MQTT-broker. Note: at the current state, the MQTT-client implemeted by powqutyd uses the port 1883 with no SSL support.
  • Furthermore the powqutyd’s MQTT-client is an publish only client, thus it will not subscribe and has no will. Nonetheless the topic under which the powqutyd’s MQTT-client publishes needs to be set. This can be done by adjusting the mqtt_topic config option in your /etc/powqutyd/powqutyd.cfg accordingly.
  • Powqutyd sends three types of messages to the MQTT-broker: i)msg_device_online, ii) msg_device_data, iii) msg_device_offline. These messages are explained below, yet all of them use a common setting which is a (universally) unique id for the devices that communicate with the same MQTT-Broker. This way the MQTT-broker can differenciate between the messages it receives. This device-unique-id is set by the config option dev_uuid
  • It is possible to print the results messages that powqutyd sends to the MQTT-Broker to stdout. This can be set by the option powqutyd_print. If set to 0 (zero) powqutyd will not print the result to stdout.
  • Running powqutyd: Once all the configuration above are done powqutyd can be started by typing: “powqutyd &” to your terminal.

Work achieved

For the powquty project, my mentor and I set up a dedicated Github page accessible under the following link:

https://github.com/thuehn/powquty

There the list of my commits can be seen under:

https://github.com/thuehn/powquty/commits/master?author=neez34

Code

The following picture depicts the folder structure of the work done during the porject.

.
├── etc
│ └── powqutyd
│ └── powqutyd.cfg
├── include
│ ├── calculation.h
│ ├── config.h
│ ├── emulator.h
│ ├── helper.h
│ ├── mqtt.h
│ └── retrieval.h
├── lib
│ ├── libpqlib.a
│ └── PQ_App.h
├── Makefile
├── src
│ ├── calculation.c
│ ├── config.c
│ ├── emulator.c
│ ├── helper.c
│ ├── main.c
│ ├── mqtt.c
│ └── retrieval.c
└── test
 ├── mqtt_test.c
 ├── usb_test.c
 └── vserial_test.c

During the project I had to reschedule the tasks planned repeatedly according to the progress and to the other circonstances. The order of the tasks changed significantly from the original plan, yet it was necessary to achieve the Goals of the project. Finally the tasks I did were in the following order:

  • First I had ported the library to a binary blob that can be used on the router.
  • Next I ve implemented the MQTT-functionality.
  • After that, I started working on the emulator, then I started working on the USB communication. For that I followed a trial and error approach, for which I used the folder called test to try out different things. Strictly speaking it is not needed at all for the software to compile and run, yet I kept it for future reference. For the USB comuication I implemented two solutions: One using libusb, and another one using virtual serial port (termios.h), since i wasn’t sure how will the USB oscilloscope will behave on the router and if any driver on the router will provide me with a tty device. luckily the kmod-usb-acm did so, thus i continued the project with the virtual serial port solution.
  • Once the USB communication was working, the next step was to retrieve the sampled data from the oscilloscope. First trials yielded the first sine signal as shown in the next figure

  • The picture shows ten sine waves corresponding to 200 ms, with 10kHz sampling rate, formed by 2048 samples. Yet as it can be seen the calibration was missing and the values were between +2500 and -2500. That is because the values (as seen in the background of the figure) where signed short numbers, and uncalibrated. (I used octave for plotting).
  • Once I was able to get the calibration parameters from the USB oscilloscope, I thereafter applyed them to the samples and got the expected sine – Wave with the Voltage-values expected in EU (RMS = 230 Volts) as shown in the next picture

  • After successful retrieval of the sampling values, I continued designing the software for powquty. I decided to use a multi-threaded approach with a Thread for sending MQTT-messages, a second for retrieving measurment samples and a third for calculating the power quality parameters. I included a ring-buffer as an interface between the retrieval thread and the calculating-thread.
  • once all three component were integrated and working together I added the configuration (using libconfig) instead of hard-coded MQTT-Broker address, and hard-coded TTY-device …etc.

Goals and future work

As described in the first blogpost, the goal of the powquty project within GSoC 2016 is to create a LEDE package which ensures the following three functionalities:

  • Retrieving sampled voltage data from the power quality measurement device via USB
  • Calculating statistical power quality parameters (such as: avg. voltage, harmonics, ect.) form the retrieved voltage samples
  • Provisioning of the calculated parameters for retrieval and graphical representation

At this point the powquty project has reached its first big Milestone where the basic functionalities set for the GSoC 2016, have been completely implemented.
Yet the end of one milestone is the begin of the next milestone.  This is why I conclude with some propositions for future work on powquty:

  • Design and implementation of error handling
  • Migration of the config to uci config
  • Design and implementation of another log option than stdout
  • Design and implementation of a Luci App for easy configuration and showing results

Nonetheless, please allow me to express my gratitude to my mentor, Dr. Thomas Hühn, for his outstanding support, and constant availability. Also great thanks are due to Freifunk, whose distinguished voluntary efforts – not only in regard to GSoC – made this possible in the first place. Last not least, great credits are due to Google for encouraging this innovative type of value creation.

Cheers,
Neez

Monitoring and quality assurance of open wifi networks out of client view (final evaluation)

Hi together,

now the time has come to explain the full Google Summer of Code Project. In both blog posts before I explained the work packages and structure of the Project [0][1]. In the first post I declare the three main subjects. Here is a short overview to remind of the project structure:

sub-projects,

Mainline project

and seminars.

The sub-projects are background work for community projects.

The mainline Google Summer of Code project is to develop a new firmware for routers, based on LEDE [2]. The third point are seminars for enlightment of technical aspects of the Freifunk Community.


First I would like to list up all sub-projects and their status.

The first of the sub-projects is the hoodselector. For a final explanation of this construct I would like to explain the following points to give you a good understanding of this concept. On the Nordwest Freifunk community we had one big problem. Due to the batman-adv management traffic, the network setup is not really scalable. This problem also exists on many other communities where they have thousands of mesh routers inside one single network. If there are too many routers inside of one layer 2 network the batman-adv management traffic will flood this network and make it useless.


Therefore in the Nordwest Freifunk Community we decided to develop the concept of hood-networking. This concept consists of two main components: The hoodfile [3] and the hoodselector[4]. The hoodfile is a json file containing all informations necessary for a definition of a geobased hood. One hood is defined by a geostationary fixed quadrants, VPN-peering- and wireless configurations. Inside a hoodfile are multiple hoods defined[5]. Following an example of a definition of a hood:


{

     “name”: “rastede”,

     “bssid”: “02:00:0A:12:A0:00”,

     “defaulthood”: false,

     “servers”: [

         {

             “host”: “ras01.sn.ffnw.de”,

             “port”: “10000”,

             “publickey”: “ca1b5487ffc20a1f90e0ac14e835d84ab9e52612b5ca62e073d0a13dad98775e”

         }

     ],

     “boxes”: [

         [

             [

                 53.22,

                 8.09

             ],

             [

                 53.36,

                 8.32

             ]

         ]

     ]

},


A hood has the following definition:


– name

The name describes the region depending on its geo coordinates. For example, if you create a hood over the city Oldenburg(Oldb) (Germany), a good name could be Oldenburg or ol as short. Every name has to be unique inside a hoodfile. Redundant names are not allowed!


– bssid

The bssid will be set for the adhoc wireless interface. This is the main part of splitting the layer 2 network. Inside the bssid there is the IPv4 sub-network encoded which is in use inside the hood. In the above json part the following IPv4 sub-network is encoded “10.18.160.0/21” dec to bin => “0000’1010 0001’0010 1010’0000 0000’0000” bin to hex => 0x0A 0x12 0xA0 0x00 hex to mac => 02:00:0A:12:A0:00. Therefore the bssid should also be unique.


– defaulthood

The defaulthood boolean is only true on the default hood. The default hood doesn’t have coordinates and is the inverted form of all other hoods with geo coordinates.


– servers

Contains an array of VPN connection informations. These informations are:

VPN server address (host)

VPN port

VPN crypto key

One VPN server should be used for one hood only! If two hoods have the same VPN server, batman-adv will loop them over VPN.


– boxes

This 3 dimensional array describes the geographical size of the hood. The surface is rectangular. You just need two points per box to reconstruct it. Here is an example:


                                          53.22,

                                          8.09 #____________

                                                   |                  |

                                                   |                  |

                                                   |                  |

                                                   |____________|

                                                                      # 53.36,

                                                                          8.32


Each hood can have any number of rectangles inside the boxes array.


To make your life a little easier you can use the hoodgen[6] and source[7] to write your json with the required informations. This is a simple web visualization tool to plan hoods and generate the right json format for the hoodfile. This tool has been written by Eike Baran. Big Thanks to him for this helpful tool!


Now to the hoodselector.

It is a software that creates decentralized, semi automated ISO OSI layer 2 network segmentation for batman-adv layer 2 routing networks. This program reads the geobased sub-networks called hoods from the above mentioned hoodfile. The decision of choosing the right hood is made on following points: first, the hoodselector checks, if the router has a VPN connection. If it has, the hoodselector then checks, if a static geoposition was set on the router. If not, it tries to get a position using wireless based localization with the so called geolocator. The geolocator [8][9][10] is a software which makes it possible to receive a position based on wireless networks “seen” around. These informations will be sent to the openwifi map project [11]. Knowing the position of the router the hoodselector can find the right hood, because each hood is defined with geocoordinates. If the Router doesn’t have a VPN connection e.g. as a mesh only router, the hoodselector triggers a WIFI scan and searches for neighboured mesh routers in other hoods. If there is an other router with a different BSSID but with the same mesh SSID, the router chooses it’s hood based on the neighboured BSSID. I got much positive feedback from many other Freifunk Communities. Someone even created a integration request issue for gluon [12]. Gluon is a framework based on openWRT[13] and is very popular in the Freifunk community [14]. Before I will send this as a patch to gluon there remains one last urgent issue [15]. The current hoodselector is not able to handle mesh on LAN or WAN connections. So there is still a potential point of failure. Because persons who are not familiar enough with the hood-networking concept can accidentally interconnect hoods over the mesh on cable functions. I plan to fix this problem up to mid of september. When this issue is closed I would like sending patches for integration to gluon. Other issues can be found here[16].


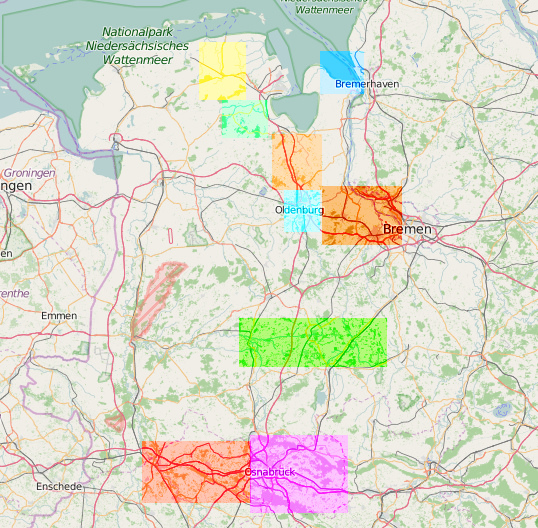
On the Nordwest Freifunk community we currently have 10 active hoods including a default hood. That is a special hood where all routers will connect to, if they are not able to choose a hood, including also routers there out of ranges from other real hoods. After the last 3 months we can safely say that the setup works. Commits can be found here[17] All currently active hoods can be see here in this picture.


As next I would like to tell you about the second sub-project as a prework for the mainline project. In that part I work on a proper workaround with the continuous-integration (CI) system of Gitlab[18]. As I explained in the midterm evaluation, on our Nordwest community we started automatically building of nightly testing firmware images for our community firmware. The CI works now with a dynamical multiple core build processes and auto generated architecture targets out of source. At the moment it is not possible for Gitlab to handle high verbose inside the web-engine while the build process. I discussed the problem with the gitlab team and open an issue [19]. The CI builder is very helpful for the developing process of the monitoring drone. Here you can see the result for the local community image[20] and for the monitoring-drone [21].


Mainline Project.

The mainline project was to create a new firmware for monitoring and quality assurance of open wireless networks. So I started reading of informatins about openWRT [13] and LEDE [2]. I decided to use LEDE as base system. I know there still no release to use this as a defined base structure (we are all looking forward to this moment) but since july 2016 I am on the developer list and the way where LEDE is growing looks good. Next I looked for a build management script. First I thought about using make and Makefiles but this was not my favourite, so I decided to use the buildscript from the Franken Freifunk community as base, which is written in bash. Now I’ll explain the structure how to work with and use it. The following directories and files are important for basic work:


buildscript ← File

     BSP ← Dir

     Community ← Dir

     build_patches ← Dir

     modules ← File


The buildscript is mainly a bash script for a humanly working with this buildroot. In other words it is an abstraction from the LEDE build ENV.


Inside the BSP directory are all necessary architecture specific informations.

BSP means Board-Support-Package. Also inside this directory are default informations like the shell banner system configs and so on.


The community directory includes community specific configurations, similar like the gluon siteconf [22]. Currently there are only two config parameters inside: first the “AP SSID” to set a default SSID with witch WIFI network should the monitoring-drone connect and the second parameter, the “AP BSSID” to set a node specific BSSID in case if more than one router with the same SSID is present. Then the monitoring drone is pinned on one specific node. This config parameter will be dropped in the future because it is not really effectively if a default BSSID is set . In future I plan to configure thous parameters over an extra web interface[23].


In the build_patches directory you can put patches for LEDE or if you what you can also put patches for each package repository. Here is a schemata:


build_patches

     lede

         0001-this is a patch.patch

         0002-this is another one.patch

     ffnw-packages

         0001-this is a patch.patch

         0002-this is another one.patch


The last file is called modules. Inside this file you can add external package repositories and also select specific packages out of this repositories. Following an example:


OPENWRT=(ffnw-packages

     $PACKAGEURL

     $PACKAGEREV)

OPENWRT_PKGS=”libwlocate lwtrace ffnw-node-info hoodselector”


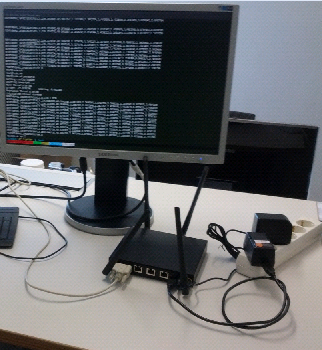
Clemens and I discussed about the API design[24] regarding the communication between the monitoring drone and the netmon core. So we met together. Here a picture:

Jan-Tarek Butt (left) and Clemens John (right)


At last point were the seminars. During the Google Summer of Code we started to gave seminars for technical aspects of Freifunk because we have not enough developers and system administrators. That is mostly a big problem in volunteer activities. On the hacking sessions we follow a simple structure:


– two lectures about Freifunk technical aspects.

– discus about the contend of the lectures

– work session on projects


On the first hacking session at the 28. may 2:00 PM we created video recordings of the two lectures, you can find them here[25]. The next hacking session were failures because of Clemens and my exams. In future there will follow other streams about tecnical aspects of Freifunk.


Last but not least, my future plans:

For the hoodselector, I plan to close up the last urgent issue[15] that I mentored in the above for the migration into gluon I also started prework on gluon for this. One part was the implementation of a sequential code minifying process at compile time [26]. Also some other issues are still open so I will continuing the work on the hoodselector[16].


For the monitoring firmware they currently is just configurable over ssh. A web interface should follow soon and also a plugin system for community specific monitoring data requests.


On the Kieler Linux information days[27] inside the Kieler Innovations- and technology center I will hold amongst others 4 presantations about Freifunk relevants themes:


    Hoodselector – Network segmentation for Layer 2 routing at 11:00 (16.09.2016)[28]

    Wireless-based localization (openwifi.su project) at 13:00 (16.09.2016)[29]

    OpenWRT Embedded Linux distribution at 16:00 (16.09.2016)[30]

    Freifunk Kiel/Nordwest (2016) – year review at 16:00 (17.09.2016)[31]


[0] http://blog.freifunk.net/2016/monitoring-and-quality-assurance-open-wifi-networks-out-client-view

[1] http://blog.freifunk.net/2016/monitoring-and-quality-assurance-open-wifi-networks-out-client-view-midterm-evaluation

[2] https://lede-project.org/

[3] https://git.nordwest.freifunk.net/ffnw-firmware/packages/blob/master/hoods/files/lib/ffnw/hoods/hoods.json

[4] https://git.nordwest.freifunk.net/ffnw-firmware/packages/blob/master/hoodselector/luasrc/hoodselector

[5] https://git.nordwest.freifunk.net/ffnw-firmware/packages/commits/master/hoods

[6] http://hood.ffnw/hoodgen.html#

[7] https://git.nordwest.freifunk.net/ffnw-server/hoodgen

[8] https://git.nordwest.freifunk.net/ffnw-firmware/packages/tree/master/libwlocate

[9] https://git.nordwest.freifunk.net/ffnw-firmware/packages/tree/master/lwtrace

[10] https://git.nordwest.freifunk.net/ffnw-firmware/packages/tree/master/ffnw-node-info

[11] http://openwifi.su/

[12] https://github.com/freifunk-gluon/gluon/issues/789

[13] https://openwrt.org/

[14] http://gluon.readthedocs.io/en/latest/

[15] https://git.nordwest.freifunk.net/ffnw-firmware/packages/issues/63

[16] https://git.nordwest.freifunk.net/ffnw-firmware/packages/issues?label_name%5B%5D=hoodselector

[17] https://git.nordwest.freifunk.net/ffnw-firmware/packages/commits/master/hoodselector

[18] https://about.gitlab.com/gitlab-ci/

[19] https://gitlab.com/gitlab-org/gitlab-ce/issues/18039

[20] https://git.nordwest.freifunk.net/ffnw-firmware/siteconf/builds

[21] https://git.nordwest.freifunk.net/ffnw-firmware/monitoring-drone/builds

[22] https://github.com/freifunk-gluon/gluon/tree/master/docs/site-example

[23] https://git.nordwest.freifunk.net/ffnw-firmware/monitoring-drone/tree/master

[24] https://git.nordwest.freifunk.net/groups/netmon-sc

[25] https://www.youtube.com/channel/UCX0nJzimLNF38pfgQIuZLEQ

[26] https://github.com/freifunk-gluon/gluon/commits/master?author=2tata

[27] http://www.kilux.de/

[28] http://www.kilux.de/index.php?seite=programm.html&untermenu=Besucher-Info#248

[29] http://www.kilux.de/index.php?seite=programm.html&untermenu=Besucher-Info#246

[30] http://www.kilux.de/index.php?seite=programm.html&untermenu=Besucher-Info#247

[31] http://www.kilux.de/index.php?seite=programm.html&untermenu=Besucher-Info#263

SWOON: Simultaneous Wireless Organic Optimization within Nodewatcher – Final steps.

This blog post concludes the work I did during the Google Summer of Code 2016.

Spending the summer on nodewatcher was a pleasantly laborious exercise. Although my proposal concerned a development of a new algorithm, I realized that I also had to prepare various other components so that the algorithm would work. I started by sketching a short plan of different components I had to integrate for my algorithm to work. To remind the readers, SWOON is an algorithm for an efficient allocation of wireless frequencies in a densely populated area where many wireless access points interfere with each other. Before any work could begin, I had to install a local version of nodewatcher. I did not want to interfere with wlanslovenija’s mature network and I needed a small network of my own to run these tests. To find such a network, I collaborated with a non-profit organization based in Berkeley, California. They provided me with access to a building outfitted with more than 10 wireless access points. The wireless access points in this testbed are extremely diverse. They come from various manufacturers and not all broadcast on the 5GHz band. This allowed me to work with issues unique to community networks: software has to be built ground-up to be extremely modular and it has to support a diverse range of equipment, since there is no central planning authority.

I started with writing the data collection module, on which I have reported in my previous blog posts. Once I was able to work with the data, I worked on a different algorithm which detected rogue nodes in networks. This is especially useful for network maintainers who now have information on which nodes are most harmful to their network. They can now significantly reduce interference by working together. Algorithms on this scale have to be extremely efficient: I derived a complexity bound of O(E * log(V)) where E is the number of edges and V is the number of vertices in a graph. This allows the algorithm to scale all the way to wlanslovenija’s network or more, as it is almost linear. In order to achieve such scalability and efficiency, I had to peruse state-of-the-art graph theory research and utilize complex data structures (the one I used is called a disjoint-set data structure) to quickly order datasets in accordance with our needs.

I then moved on to the main algorithm, which took weeks to even rigorously define, let alone code up. I first considered implementing the Beigel-Eppstein coloring algorithm, which is known to run in ~O(1.3^n) time, but the complexity of the algorithm rendered it impractical. It relies on 19 different subcases which are iteratively used to simplify the constraint satisfaction (CSP) instance. Instead, I reverted to a custom implementation of a state-of-the-art greedy approach, which had to be modified from the source code of NetworkX, a leading open-source graph manipulation package. I devised a custom way of ordering the nodes in a graph to correctly prioritize wireless access points. The algorithm starts with looking at all the ‘neighbors’ (other nodes your radio detects) and computes the ‘busyness’ of each frequency band. We then minimize joint interference through the algorithm.

We observed an interesting property when running this algorithm on our wireless testbed. Most frequencies were moved to minimize interference, but some got worse. At first, we thought it was a bug, but we did eventually discover that some nodes must pick up more interference for others to remain noiseless. This perfectly coincides with our goal, which is to minimize the interference over all nodes, not every single node.

Next steps

One major problem with the algorithm is how unreliable ‘signal’ data is. We were thinking of coming up with a better metric to measure link quality instead of using signal strength. We were considering using the number of packet collisions instead. The modular design allows us to painlessly replace the metric without having to understand the entire algorithm.

We also noticed openWRT’s iwinfo doesn’t provide information about channel widths of access points. Adding this data would allow more accurate calculations instead of assuming all channels are 20MHz wide.

Finally, nodewatcher doesn’t yet have support for issuing node-specific warnings. I’d love to use such a warning to let a maintainer know that their node needs to change the channel.

However, I am confident this algorithm will enhance our user’s experience.

All my contributions can be seen on this link:
https://github.com/wlanslovenija/nodewatcher/commits/development?author=CdavM

If you’re interested in the timeline of the development, look at the following pull requests on nodewatcher’s GitHub:
Bug fixes related to a local installation of nodewatcher:
https://github.com/wlanslovenija/nodewatcher/pull/18
https://github.com/wlanslovenija/nodewatcher/pull/20
Data collection module:
https://github.com/wlanslovenija/nodewatcher/pull/22
Command that users can use to export data from the data collection module:
https://github.com/wlanslovenija/nodewatcher/pull/23
Improving the data collection module:
https://github.com/wlanslovenija/nodewatcher/pull/24
Algorithm that detects rogue nodes in one’s network:
https://github.com/wlanslovenija/nodewatcher/pull/25
Additional options for user-friendly data export command:
https://github.com/wlanslovenija/nodewatcher/pull/26
Testing framework for the rogue node algorithm + improvements:
https://github.com/wlanslovenija/nodewatcher/pull/27
Channel allocation algorithm implementation (not merged yet):
https://github.com/wlanslovenija/nodewatcher/pull/28
Updated data in nodewatcher/core:
https://github.com/wlanslovenija/nodewatcher/pull/29

Upadate on the powquty project

Dear Freifunkers,
please allow me to update you on the progress if the powquty Project within Google Summer of Code 2016 at Freifunk.

As mentioned in my last blog the goal of the project is to create a LEDE package which ensures three functionalities:

  • Retrieving sampled voltage data from the power quality measurement device via USB
  • Calculating statistical power quality parameters (such as: avg. voltage, harmonics, ect.) form the retrieved voltage samples
  • Provisioning of the calculated parameters for retrieval and graphical representation

Herein I will give a short update about the progress of these functionalities.
For this project we are using an off-the-shelf USB-based oscilloscope “WeSense” from the company A.Eberle. The oscilloscope provides real time samples of measured voltage from the power plug via USB bus, using a binary protocol and a sample frequency up to 10kHz. Initially the oscilloscopes USB bus supported the host functionality only. Hencethe router would need to act in USB device mode, which is a rather unusual mode to be supported by todays WiFi router platforms. To overcome this limitation, aforementioned company agreed to provide us with another hardware implementation that implements the USB device functionality with optional five volts power feeding functionality. The new hardware is expected on my desk in mid July.
As a counter measure for this delay, we started implementing an emulator, that locally generates a signal-samples, which are then organised in packets as similar to the binary protocol.
Regarding the calculation of the power quality parameters functionality, we successfully ported the power quality library (in Ansi C) from A.Eberle to compile and run under Linux LEDE.  The libraries functionality allows to calculate the frequency, effective voltage, harmonics, and phase shift, from the signal samples in an efficient way. We provide this library as binary blob, since it is basically not open sourced (yet), and originated from the manufacturer himself. Now it is ported for LEDE, and can be used for our purposes.
For the provisioning of the calculated parameters, we intend to implement a luci app that shows the calculated parameters.
The rest of the project timeline is depicted below:
Working phase: June 20th – July 10th

  • Finalize the emulator
  • Integration with the power quality library.
  • first prototype of the provisioning functionality

Working phase: July 11th – July 24th

  • Finalize the provisioning functionality
  • prototype implementation of sample retrieval (given that the hardware is delivered)

Working phase: July 25th – August 7th

  • Integration of the three functionalities into a working implementation
  • Software Testing and bug fixing
  • Documentation of the integrated  functionalities

Working phase: August 8th – August 21st

  • Buffer for possible delays

More updates in the upcoming weeks.
BR,
Neez

Implementing Pop-Routing – Midterm Updates


Hi Everyone!

Today has started the midterm evaluation, the deadline Is next Monday, so I have to show the work I have done ‘till now. It can be resumed in the following parts:


1) Refactoring of graph-parser and C Bindings

During the community bonding period I started working on the code of Quynh Nguyen’s M.Sc. Thesis. She wrote a C++ program capable of calculating the BC of every node of a topology [1]. I re-factored the code, and now it is a C/C++ shared Library [2]. I’ve also applied some OOP principles (Single responsibility and inheritance) and unit tests to make it more maintainable.

The interface of the library Is well defined and it can be re-used to implement another library to perform the same tasks (parsing the json and calculating the BC).


2)Prince Basic functionalities

After I completed the library a started working on the main part of the project. the daemon. We decided to call it Prince in memory of the Popstar.

This daemon connect to the routing protocol using the specific plugin (see below), calculate the BC using graph-parser, computes the timers and then it push them back using again the specific plugin. With this architecture it can be used with any routing protocol.I wrote the specific plugin for OONF and OLSRd. At the moment it has been tested with both, but I need to write a plugin for OLSRd to change the timers at runtime. For OONF I used the RemoteControl Plugin.

With these feature Prince is capable of pulling the topology, calculate the BC and Timers and push them back to the routing protocol daemon.


3) Additional Features: Configuration file, Dynamic plugins,

I wrote a very simple reader for a configuration file. Using the configuration file the user can specify: routing protocol host and port, routing protocol (olsr/oonf), heuristic, (un)weighted graphs.

As you can see from this Issue [3], I’m going to use INI instead of this home-made format.

As I said before I moved to a specific plugin all the protocol specific methods (pulling the topology and pushing the timers), to keep the daemon light I decided to load this plugin dynamically at runtime. So if you specify “olsr” in the configuration file just the OLSRd specific plugin will be loaded.


At the moment I consider this an “alpha” version of Prince. In the next 2 months I’ll be working on it to make it stable and well tested. The next steps will be:


  • Close all the Issues [4]
  • Write tests and documentation for Prince.
  • Write a plugin for OLSRd


Cheers, Gabriel


[1]: https://ans.disi.unitn.it/redmine/projects/quynhnguyen-ms

[2]: https://github.com/gabri94/poprouting/tree/master/graph-parser

[3]: https://github.com/gabri94/poprouting/issues/4

[4]: https://github.com/gabri94/poprouting/issues

Monitoring and quality assurance of open wifi networks out of client view (midterm evaluation)

Hey everyone,
 
Now we are on the midterm evaluation. I would like to tell you what I have done so far and what will come next. In the first post [0] I explained the work packages. In this post I will come back to the work packages  and show you what I have done for each package.
 
The first sub-project was the hoodselector. At the beginning of the work period I did some bugfixing for the hoodselector so that we where able to deploy the hoodselector in our live environment. The hoodselector creates decentralized, semi automated ISO OSI layer 2 network segmentations. You can find a detailed discription here [0]. Retrospective I can say that the deploymend of the hoodsystem went without any major problems opposed to my first expectations. Currently we have 4 hoods active. Around Oldenburg(Oldb), Ibbenbüren, Osnabrück and Friesland. More hoods will follow in future. Open Issues can be find here [1].
 
The second sub-project was to create a propper workaround for building images with the continuous-integration (CI) system of Gitlab using make on multiple cores.
The Freifunk Nordwest firmware now has automatically built testing images that are not only build on a single core but can be built on multiple cores. And the architecture targets are also autogenerated out of the sourcecode. This makes it possible to generate images dynamically for all targets also including new targets that may come in the future. I implemented a small algorithm that manages the thread counter of make commands. I use the number of CPUs out of /proc/cpuinfo * 2 this means for each logic core will follow two threads. In example our runner02.ffnw.de server has 8 cores so the CI build process will automatically build with 16 Threads [2]. Here is an example of a passed buildprocess with our CI builder[3]. Actually it is not possible to build images with a high verbose output, because the CI logfiles will get to big. That makes it impossible to use the webfrontend for analyzing the buildprocesses. I opened an issues for this and discussed the problem with the gitlab developers [4].
The CI builder is very helpful for the developing process of the monitoring drone.
 
Following I would like to report about our first hacking seminar.
The first hacking seminar was on 28.05.2016. We started with two presentations. One about Wireless Geo Location and the second one about the Hoodselector. We recorded the presentation with our new recording equipment [7] bought using some of the money for the mentoring organisation and uploaded the recordings to youtube [5].
 
The first presentation was about geolocating with wireles technologies.
Based on the Nordwest Freifunk geolocator [6]

The second presentation was about the function of the Hoodselector

 
After this two presentations we had a smal disscussion about the presentation topics and than we started o
ur hacking session where the developers started coding on their projects.
 
Now all sub-Projects are finnisched and I will continue with the Monitoring Drone Project after I finish my Study exams. Also the date of next hacking seminar is set for 9th of Juli 2016. Again we will have two presentations. One on Gitlab CI and one about how to use our new Puppet Git repositories including the submodule feature. The presentations will be recorded and after the presentation we will have a coding session like last time.
 
Timeline:
23. May: Community Bonding (3 weeks)
test and deploy hoodselector  <- Done
16. May 6:00 PM: GSoC Mumble  <- Done
Refine the roadmap  <- Done
23. May – 20. June: Work period 1 (4 weeks) <- Done
28. May 2:00 PM: hacker-session  <- Done
  1. Presentation about the hoodselector <- Done
  2. Presentation about the openwifi.su project[4] and the geolocator <- Done
13. June 6:00 PM: GSoC Mumble  <- Done
Midtermevaluation
Tarek & Clemens exams!!!
20. June – 15. August: Work period 2 (8 weeks)
9. July 2:00 PM: hacker-session
  1. Presentation about workaround with git CI processes.
  2. Presentation about puppet deployment system
13. June 6:00 PM: GSoC Mumble
25. June 2:00 PM: hacker-session
  1. Presentation about workaround with git CI processes.
  2. Presentation about puppet deployment system
18. July 6:00 PM: GSoC Mumble
30. July 2:00 PM: hacker-session
  1. actual unknown
  2. actual unknown
15. August 6:00 PM: GSoC Mumble
Finalevaluation